![]()
![]()
![]()
MOOG TAURUS 1 BASS PEDALS - RESTORATION/ REPAIR
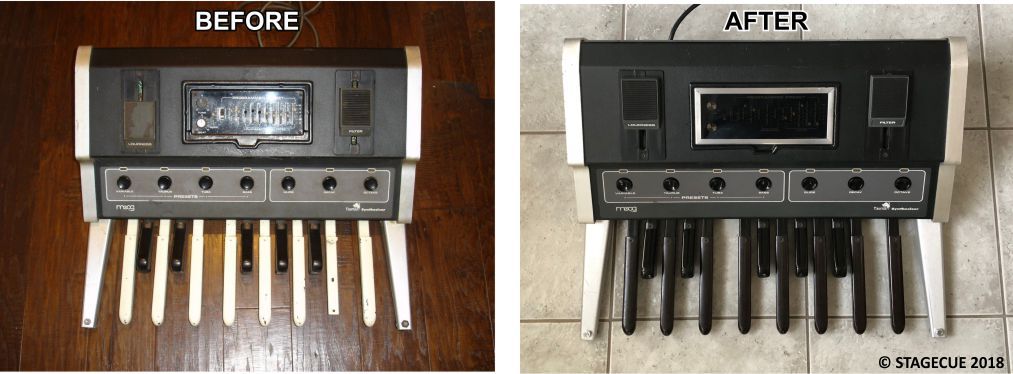
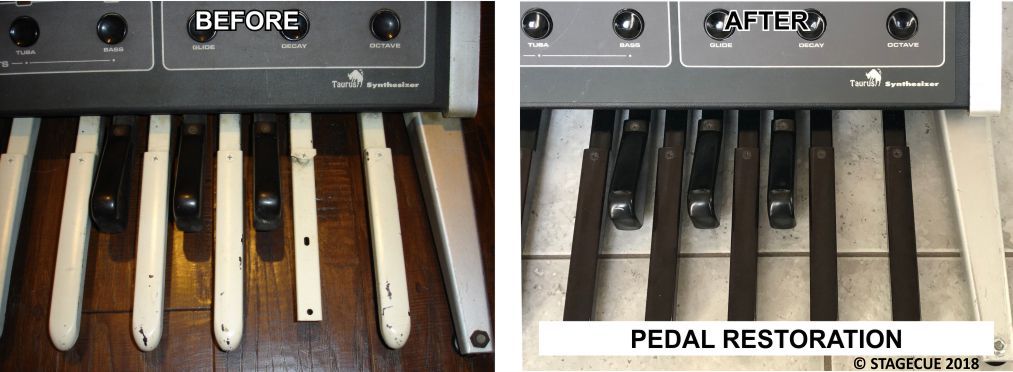
I am always looking for not-working vintage equipment that I can restore and massage gently back into working condition. Recently, I came upon a 1976 Moog© Taurus 1 that was listed as for-parts-or-repair for a reasonable cost. It looked like all of the major parts were present; beside a broken foot-pedal cap, a missing preset door and a missing rubber pad for the 'LOUDNESS' slide-pedal. I took a chance knowing that the risk was low and the chance of success was high... The only other thing that I noticed was that the natural pedals were painted white like a piano. Here are some before and after pix...
Here is how I tackled the project... _________________________________________
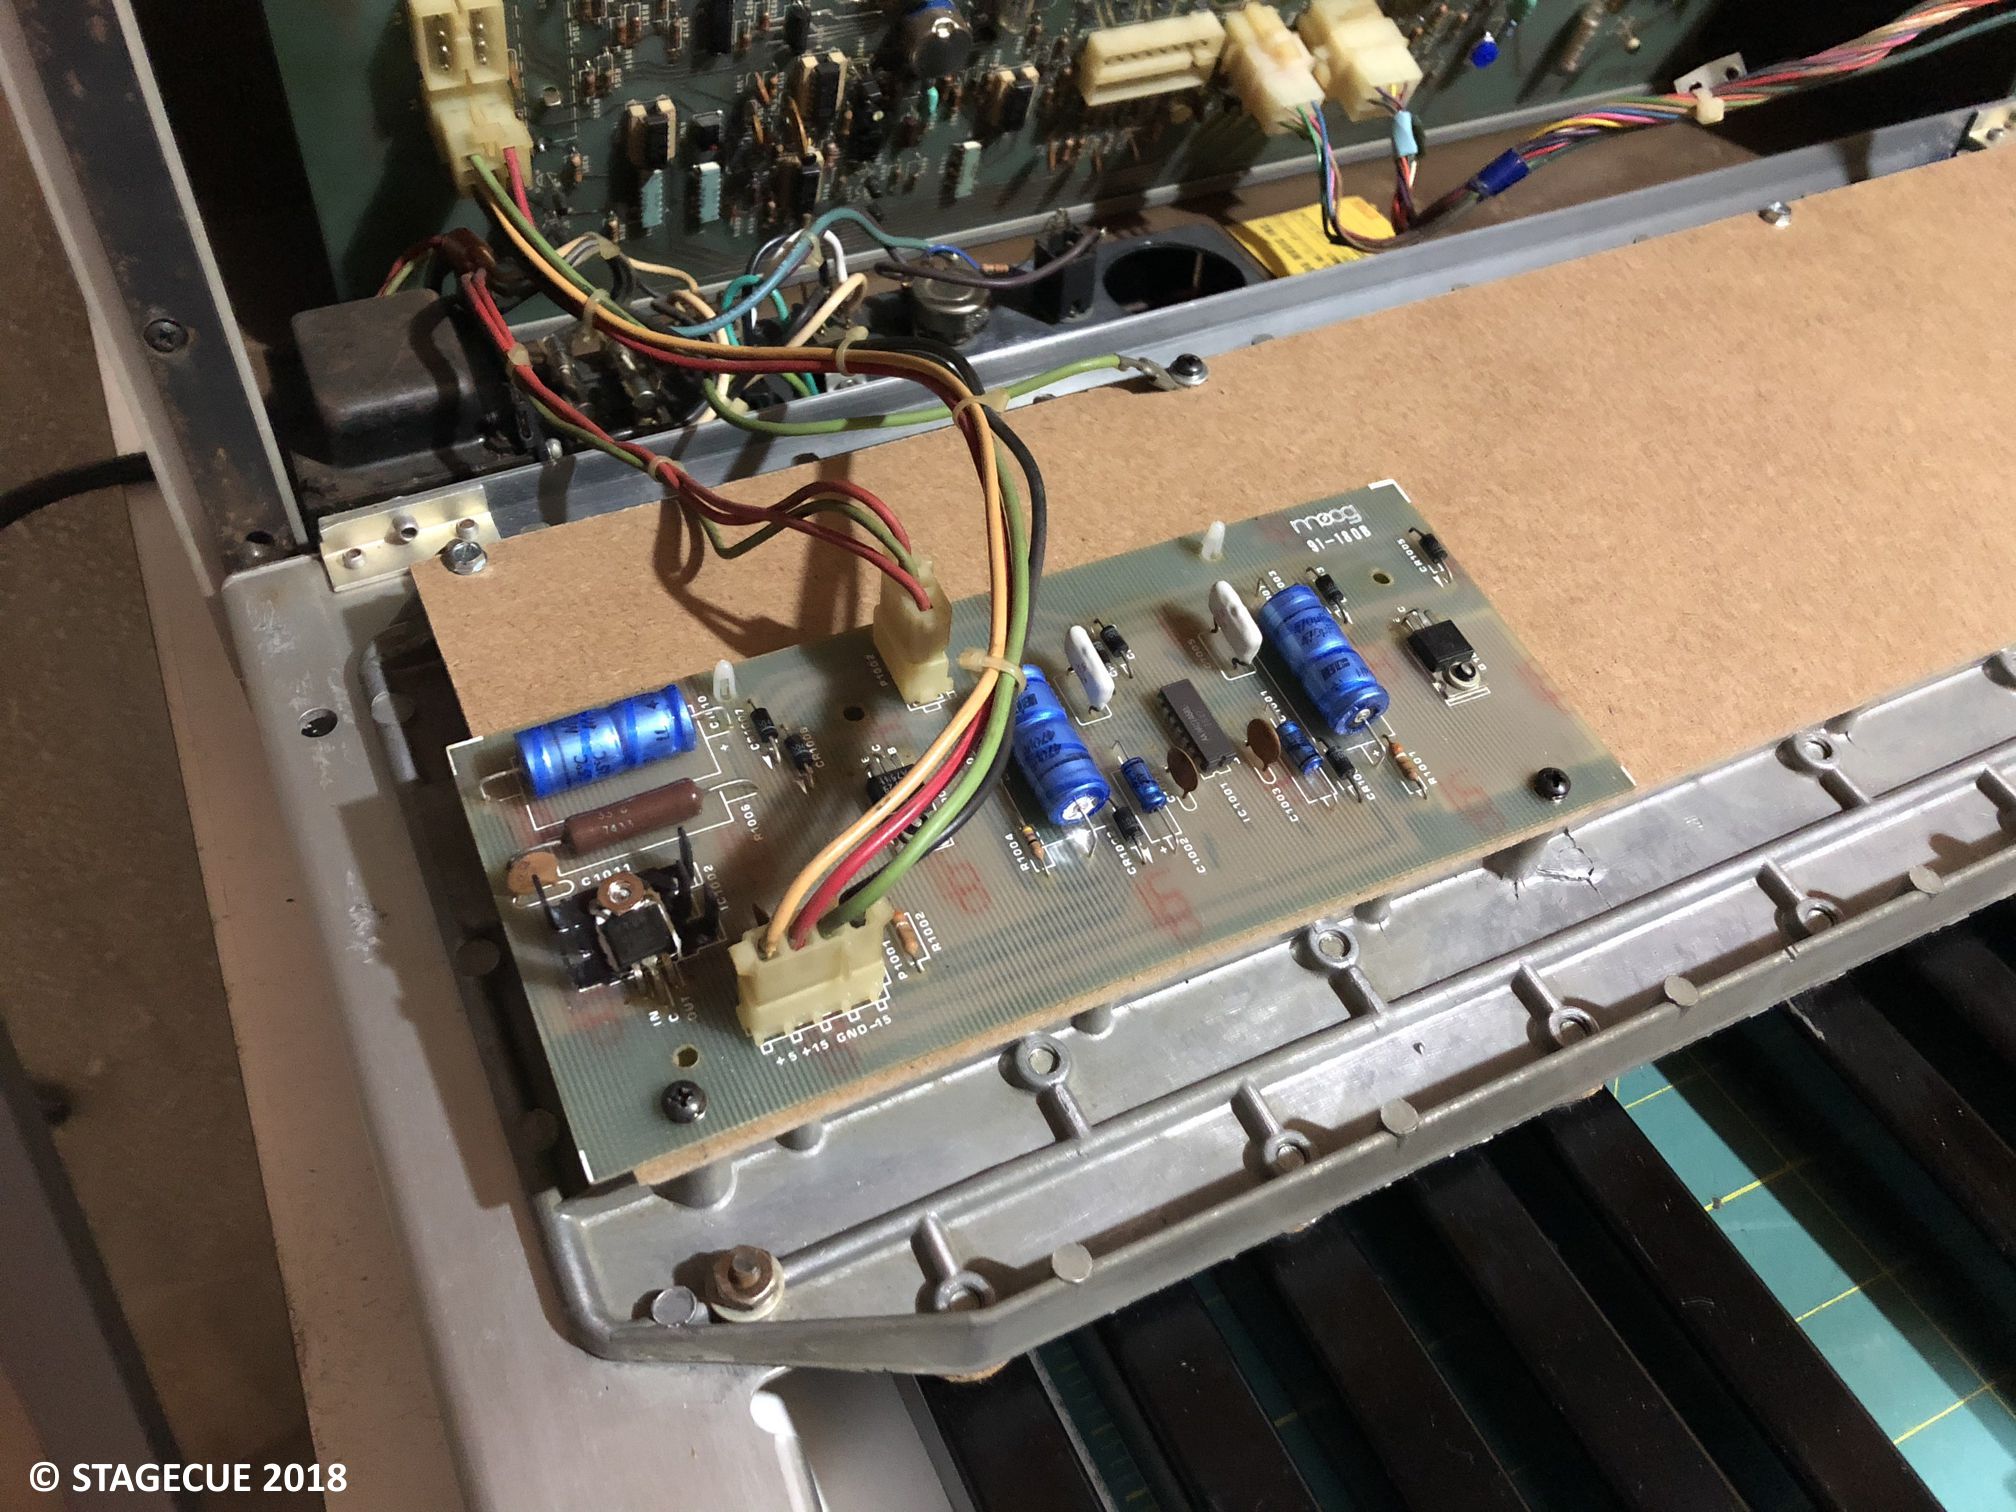
POWER SUPPLY REWORK I removed the power supply, replaced all of the electrolytic capacitors and checked all of the existing solder joints for problems. I removed the 7805 regulator heatsink, cleaned it and re-installed it with new heatsink grease. I also re-created the fiber-board platform that protects the main board from dirt and dust. The original board was damaged and required new screws and PCB stand-offs for the power supply. I verified that the +5, +15 and -15 VDC outputs were within specification.
_________________________________________
CHASSIS CLEANING The Taurus was disassembled by removing the PCB/ switch assembly and removing the end-blocks from the bent metal chassis... The bent metal chassis was degreased and the end-blocks were brushed clean of dust. The Key-bed was disassembled and the pedal-frame was cleaned using a 3M sanding pad to polish the aluminum.
PCB DE-GREASE The solder side of the Main PCB needed to be degreased and washed. This cleaning is very important for the T1 as contamination will cause pitch problems. A few cycles of Eco-friendly cleaner was sprayed on the solder-side of the PCB, vigorously brushed with a hog-hair brush, rinsed with distilled water and then dried with compressed air and a hair-dryer.
REPLACE ELECTROLYTIC CAPS Since the Power Supply Electrolytic caps were removed and replaced, I had to do the same with the Electrolytic caps on the T1 Mainboard as well... I couldn't risk not changing-out these >42 year old caps.
_________________________________________
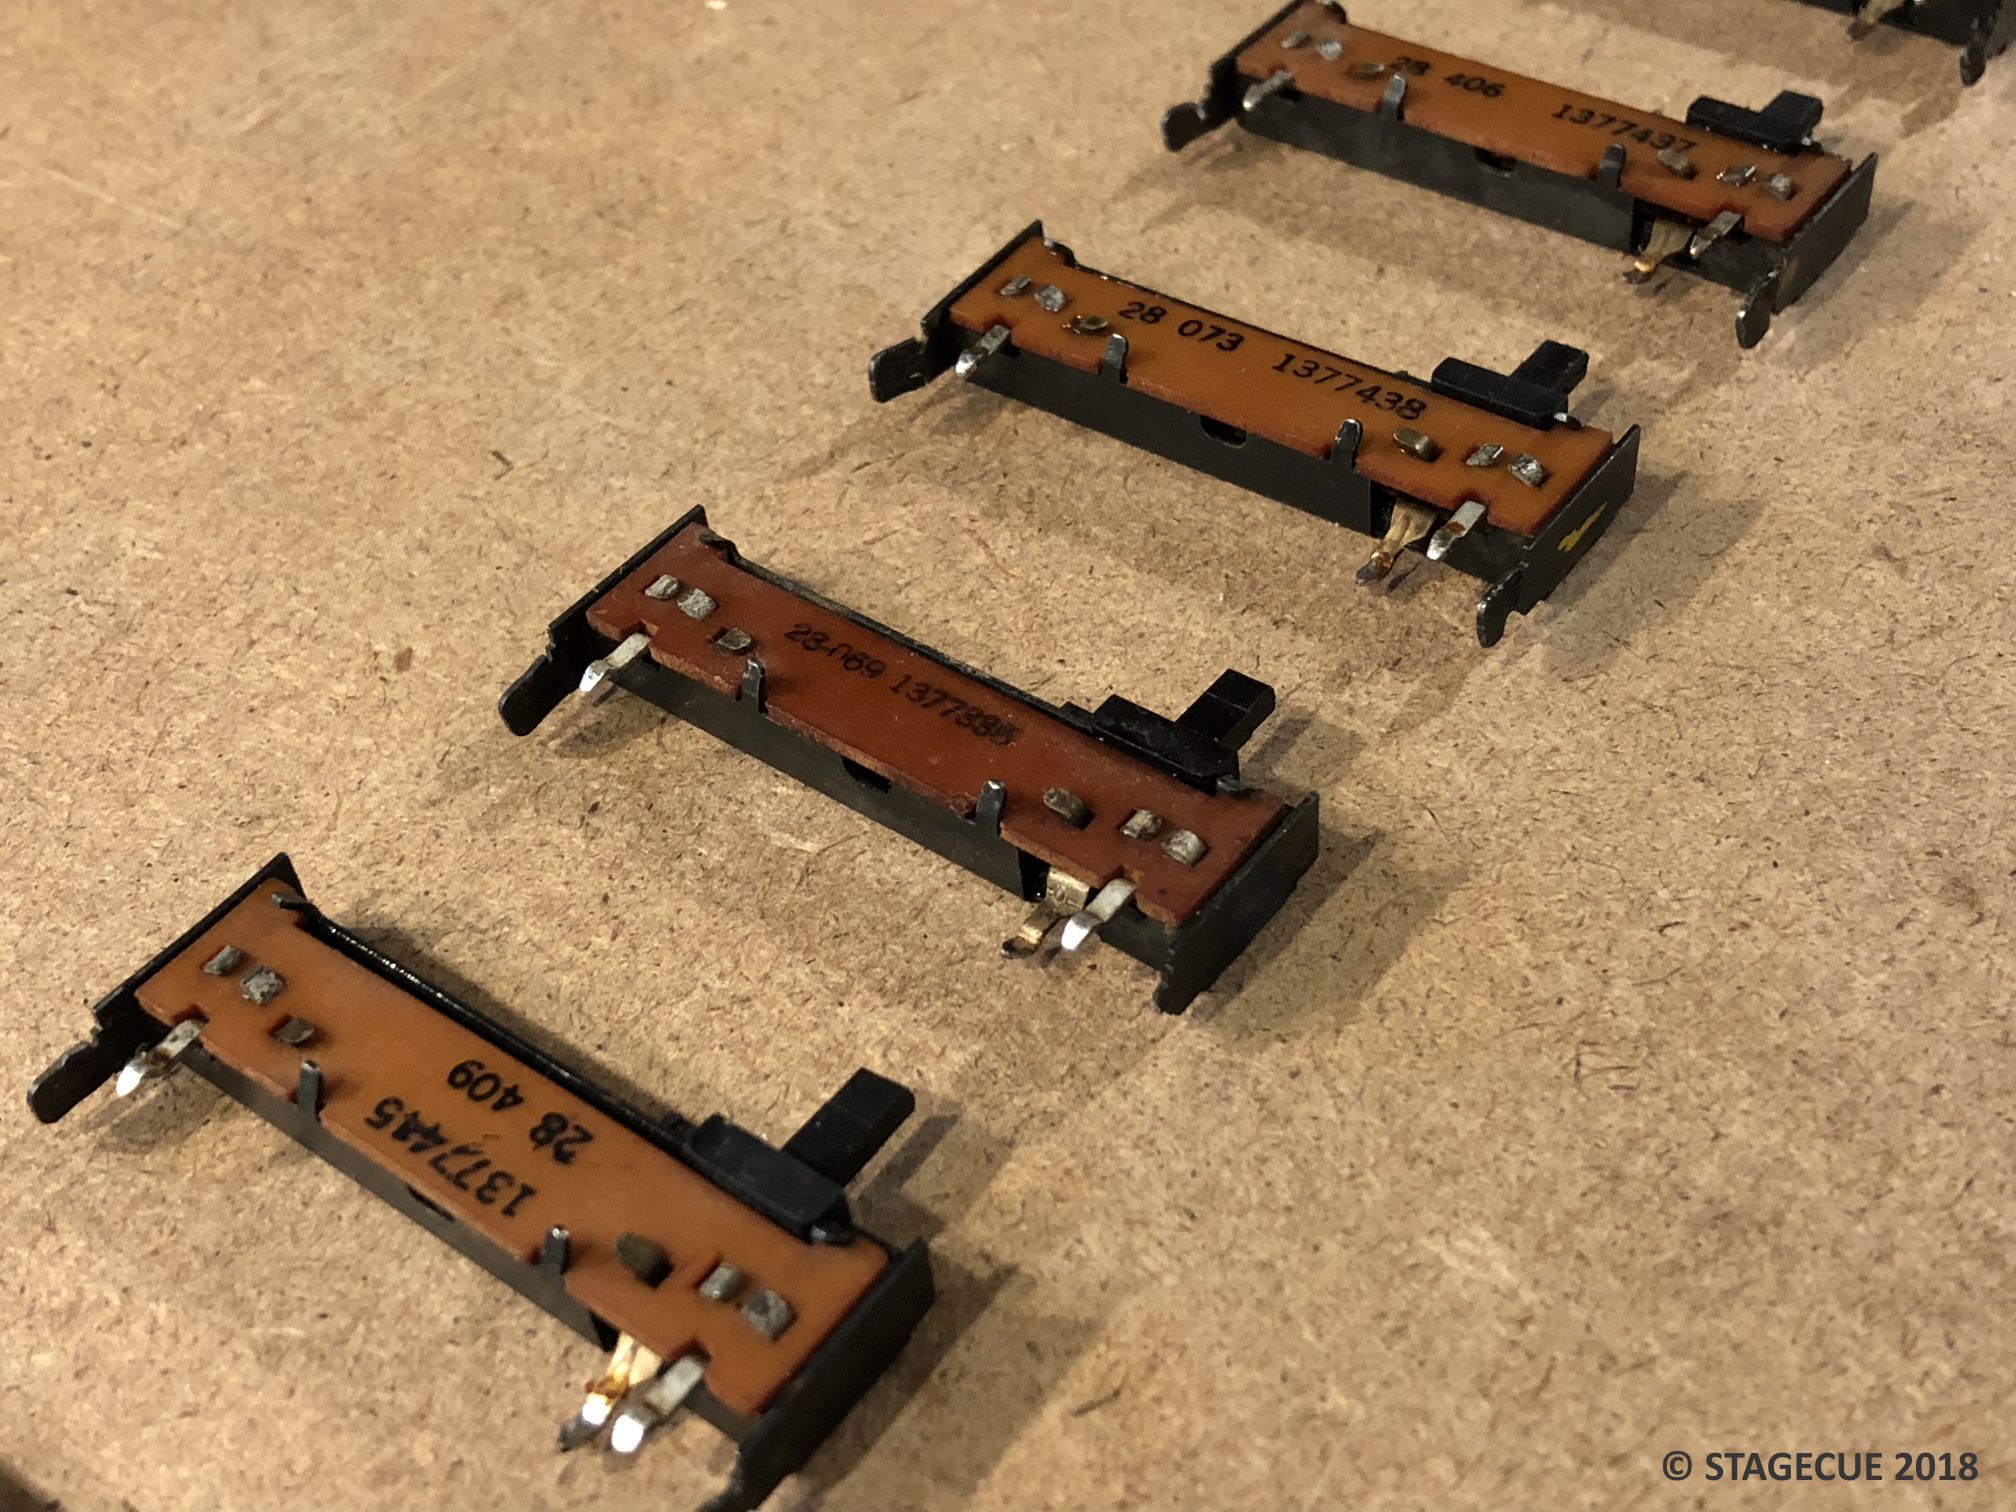
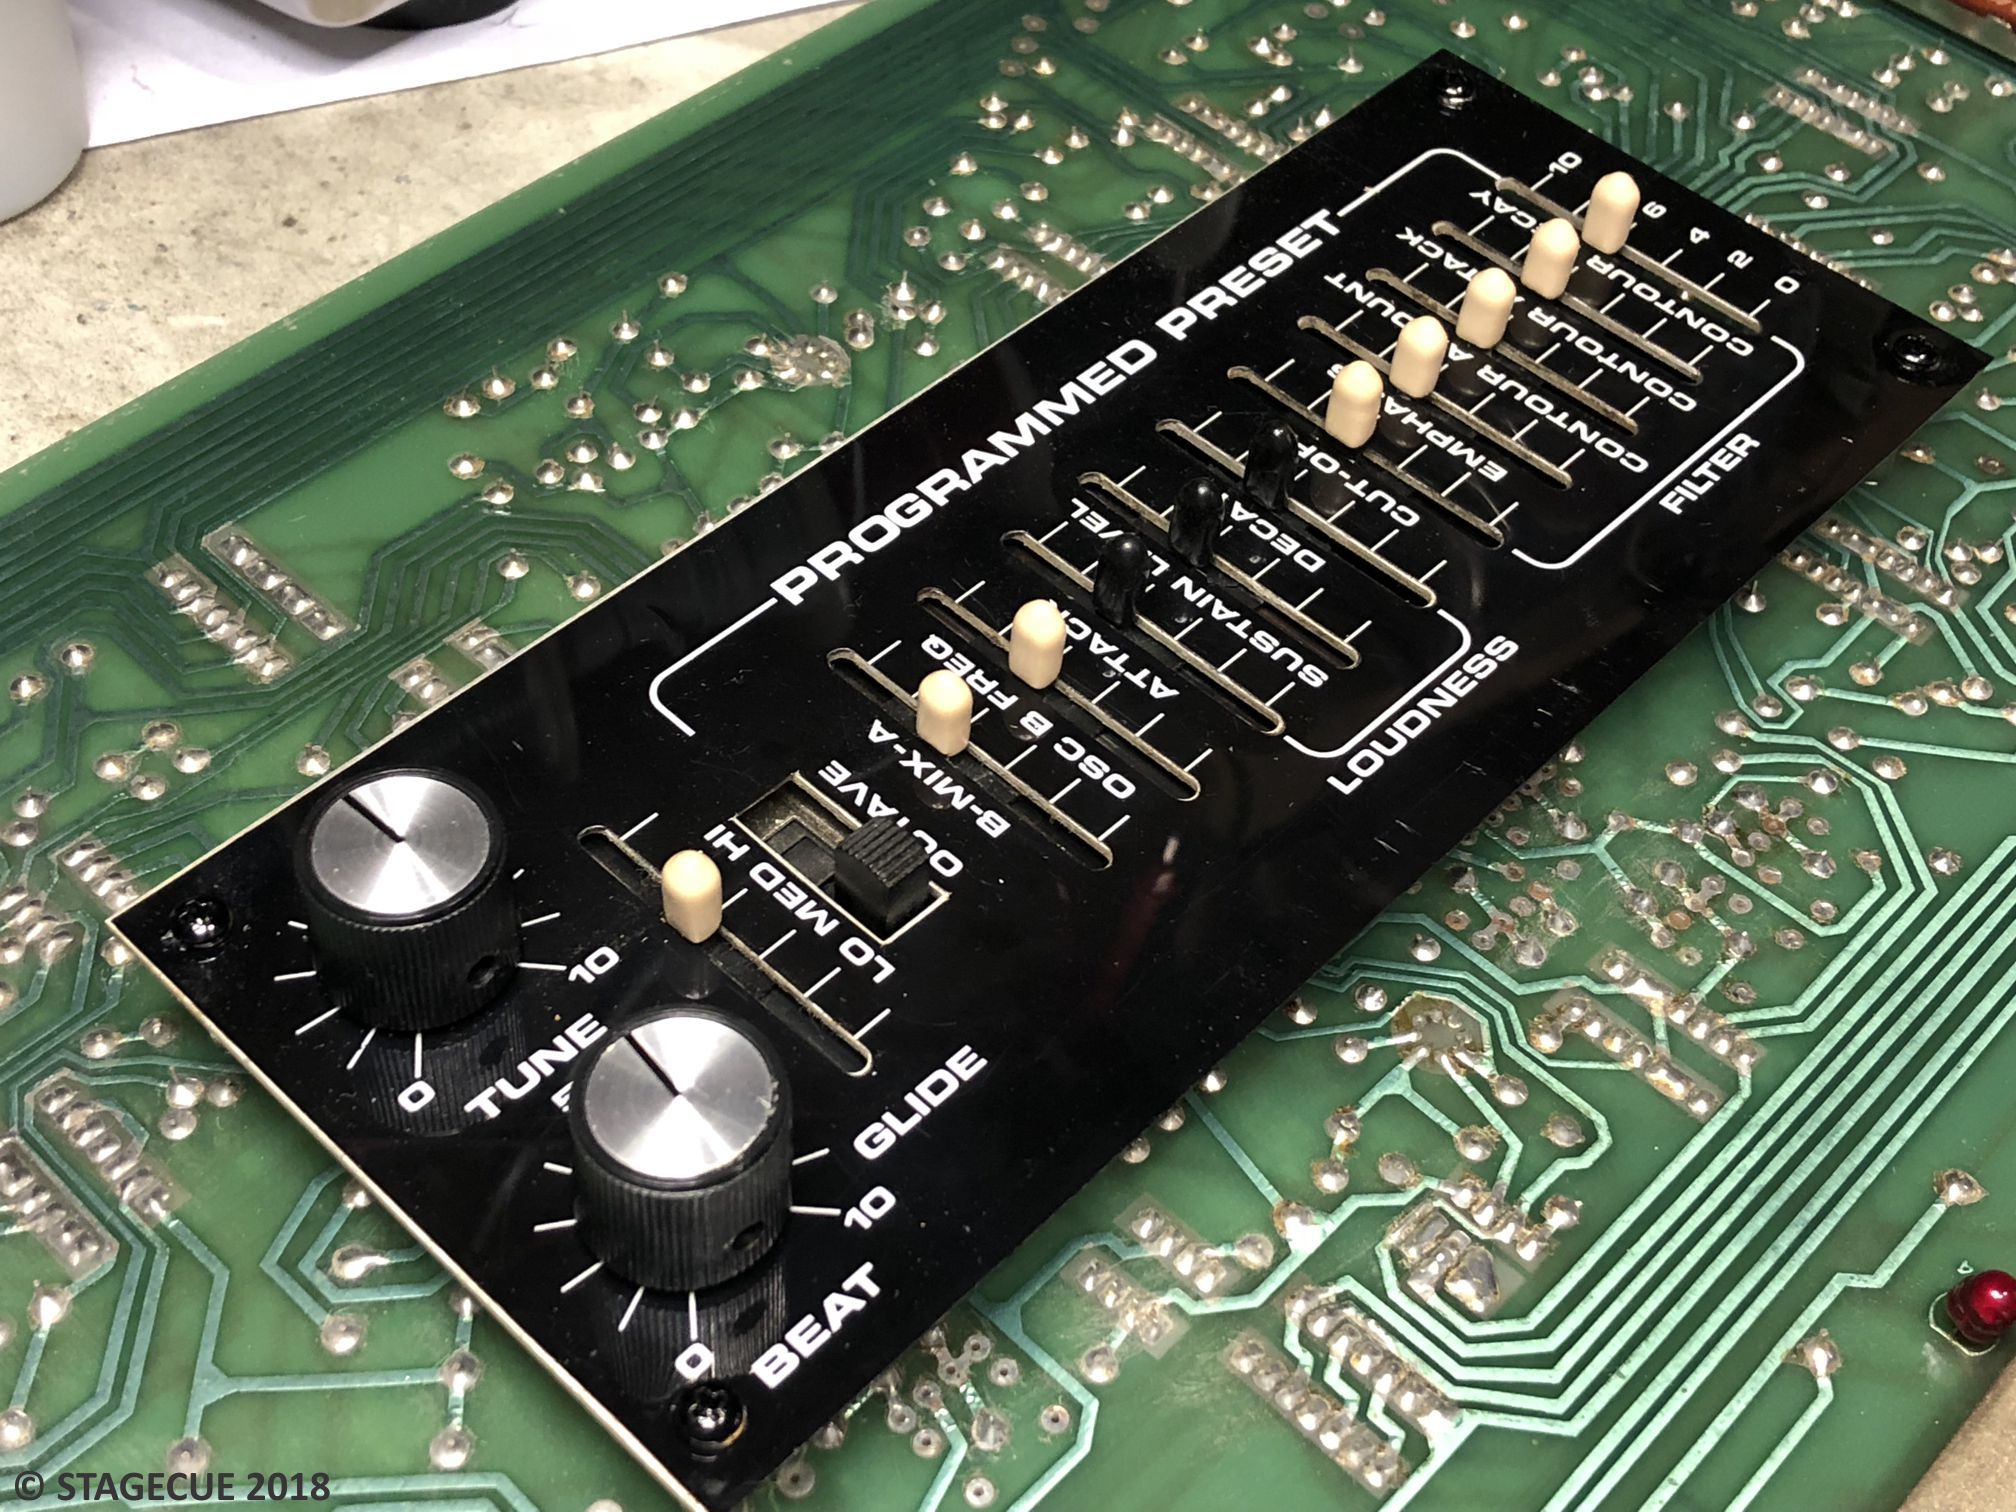
POTENTIOMETER CLEANING/ RE-LUBE All of the slide-pots were de-soldered from the circuit board and disassembled for cleaning and re-lubrication with DeOxit© D5, D100 and Fader Grease.
The sliders were re-soldered into the Main circuit board and the slider panel was cleaned and polished to as-good-as-new...
_________________________________________
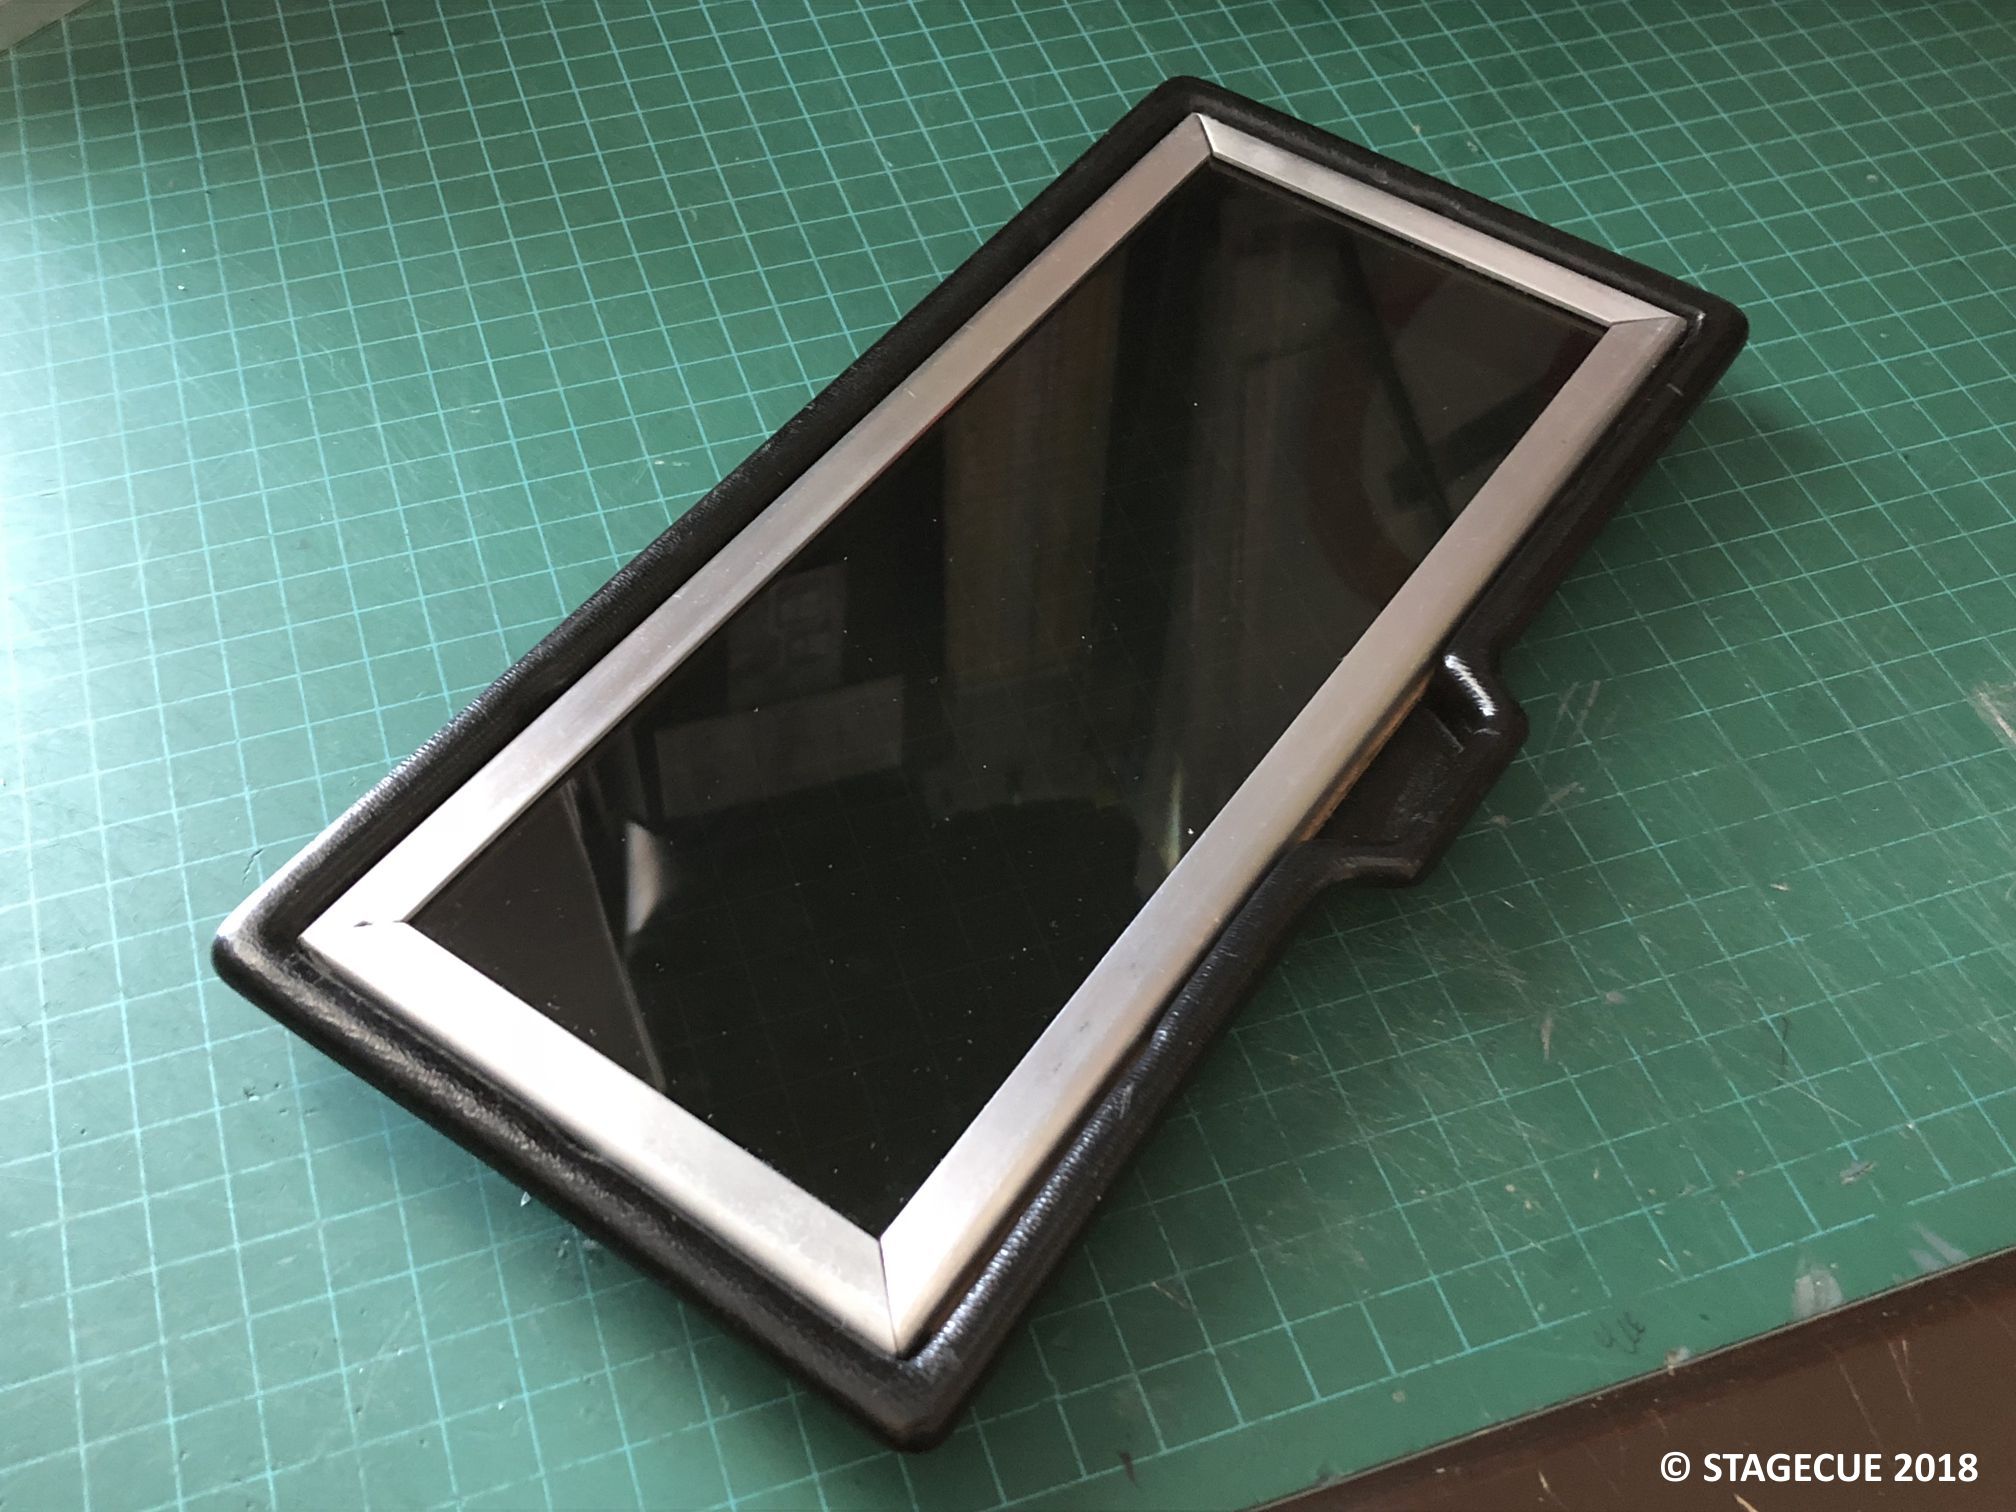
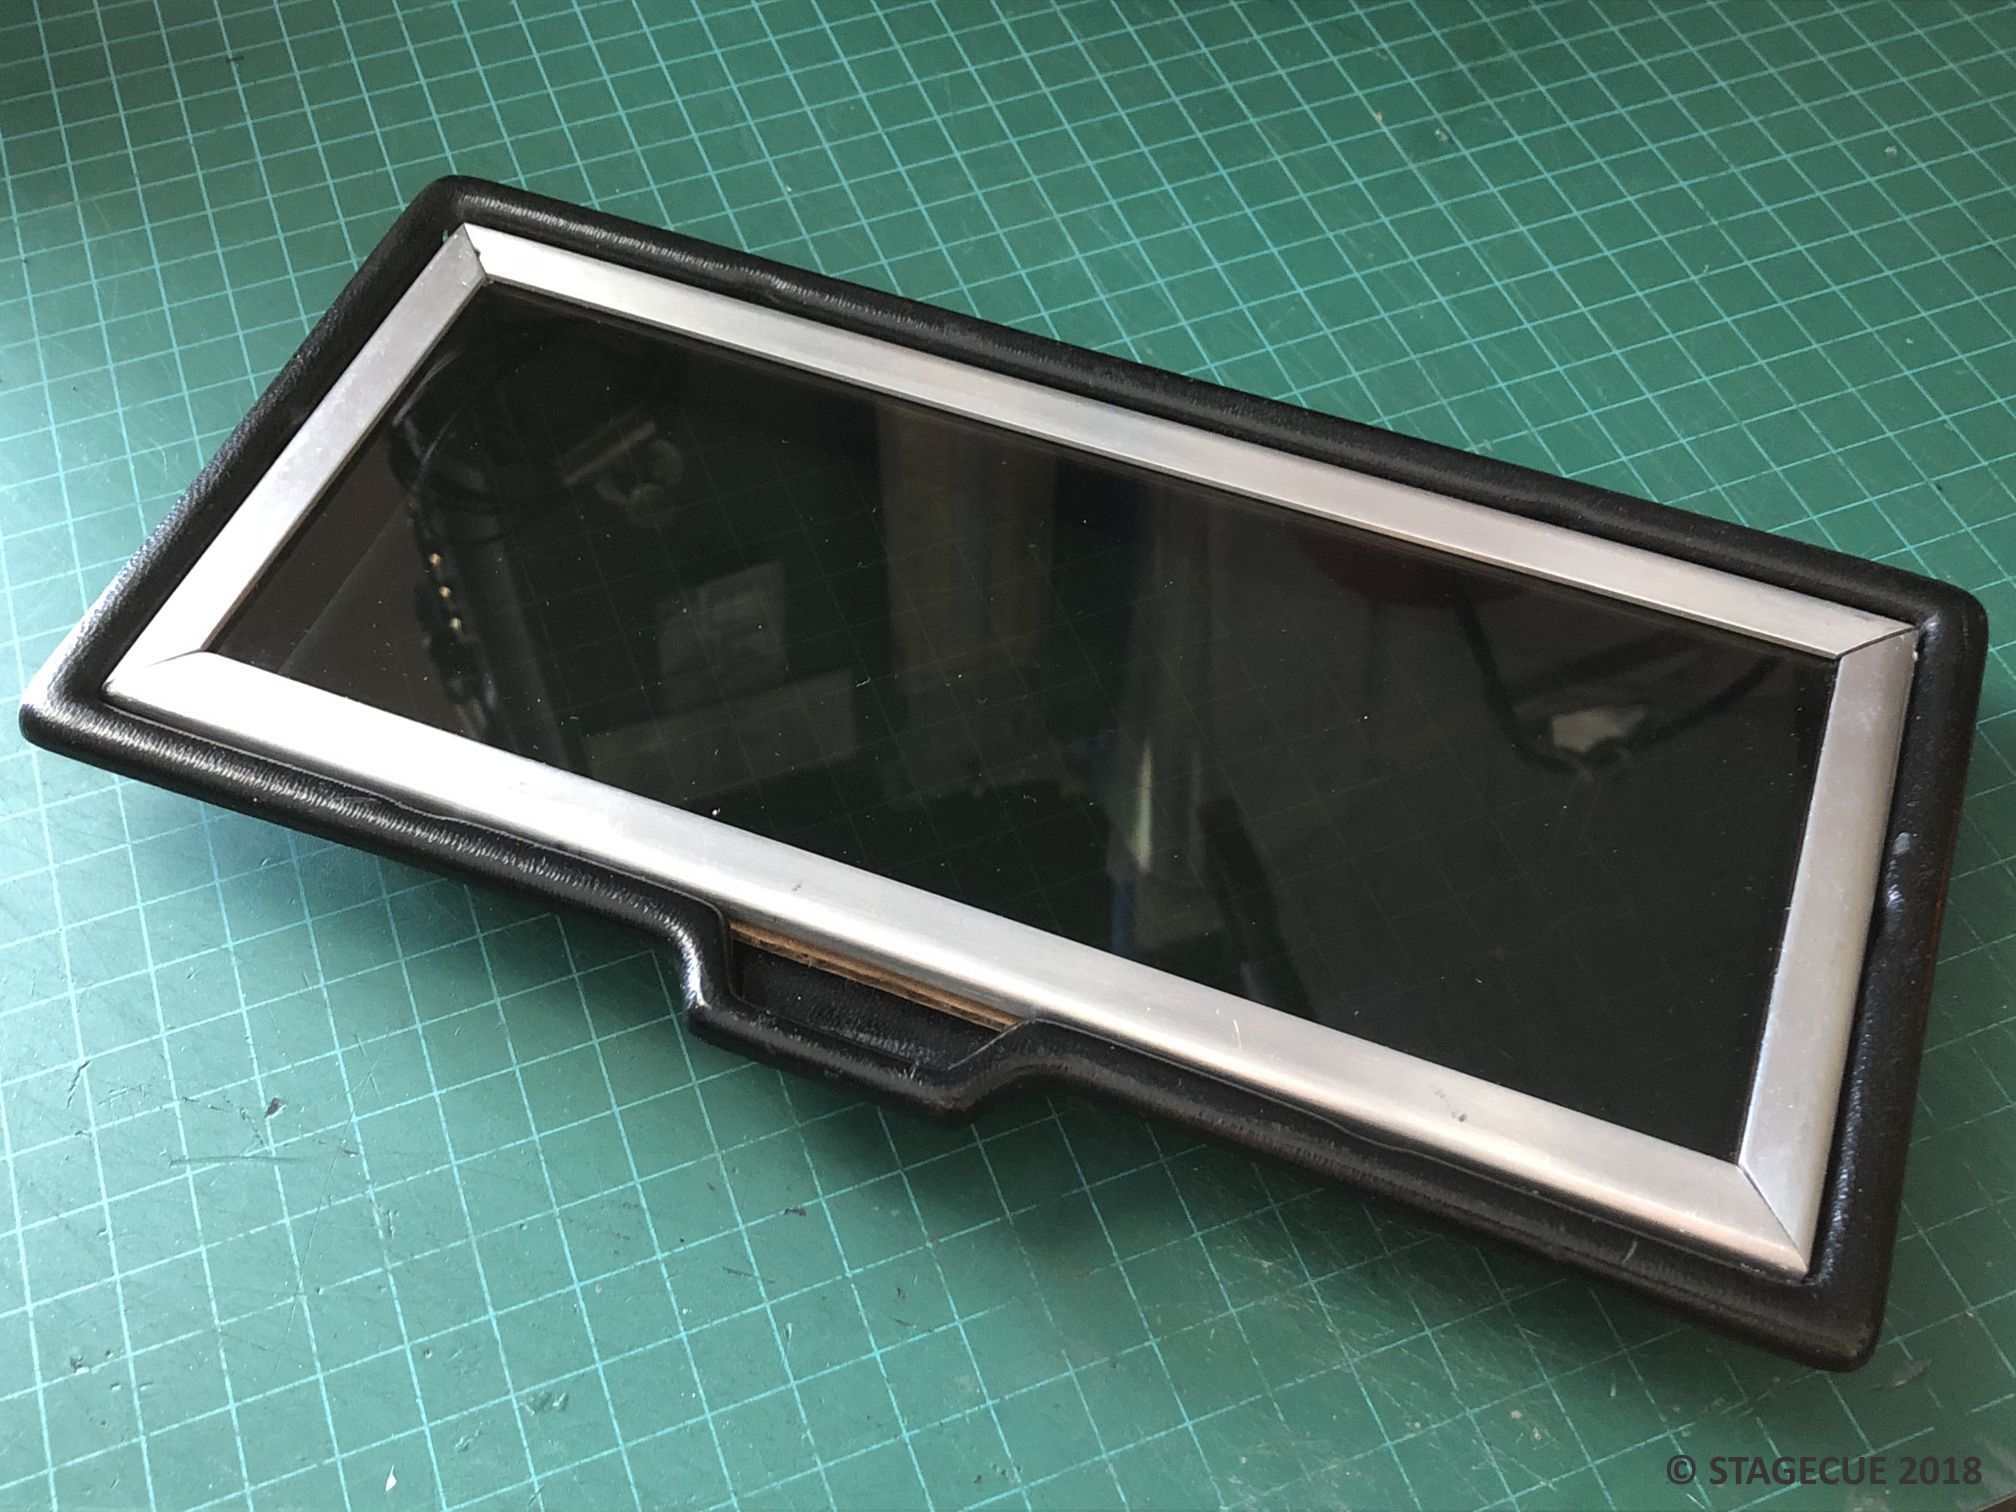
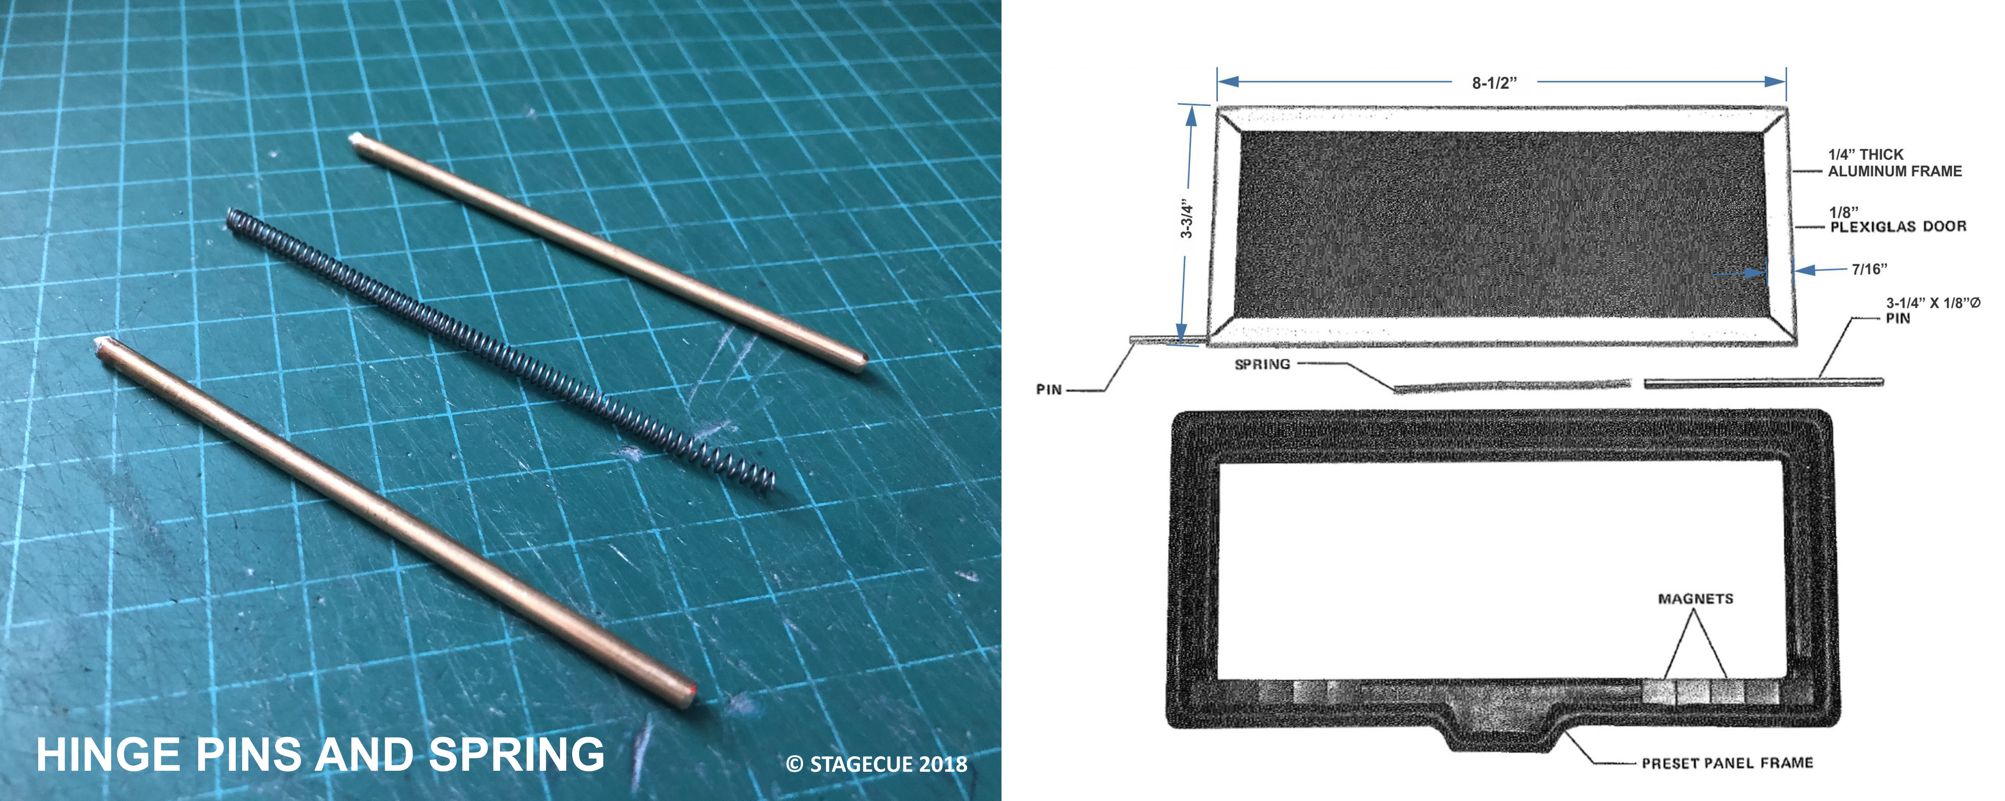
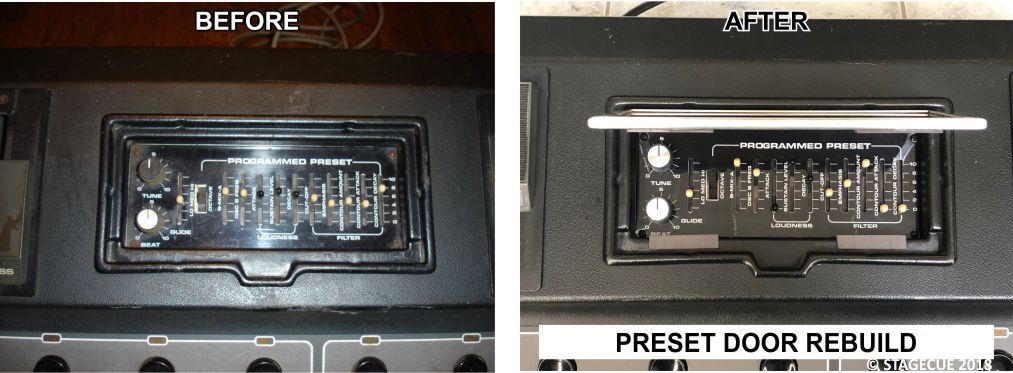
PRESET DOOR Since the Preset Door/ Window was missing, I needed to custom make one out of aluminum channel, smoked PlexiGlas with brass pins and a compression spring for the hinge. I included magnets for retension of the door during transport...
_________________________________________
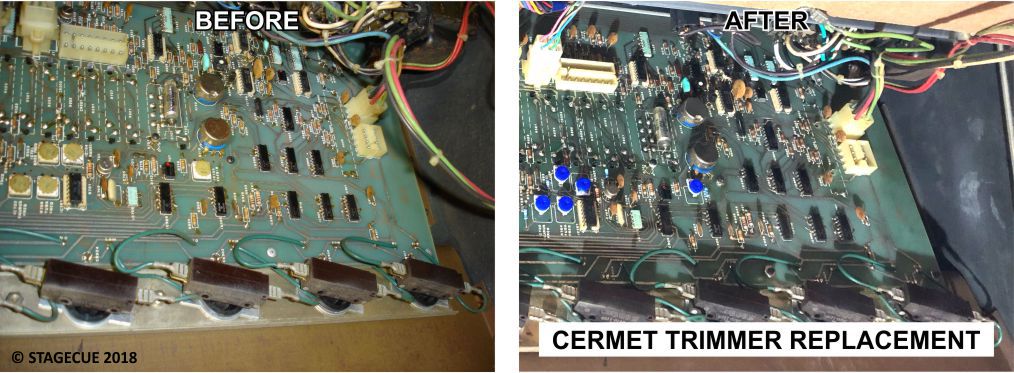
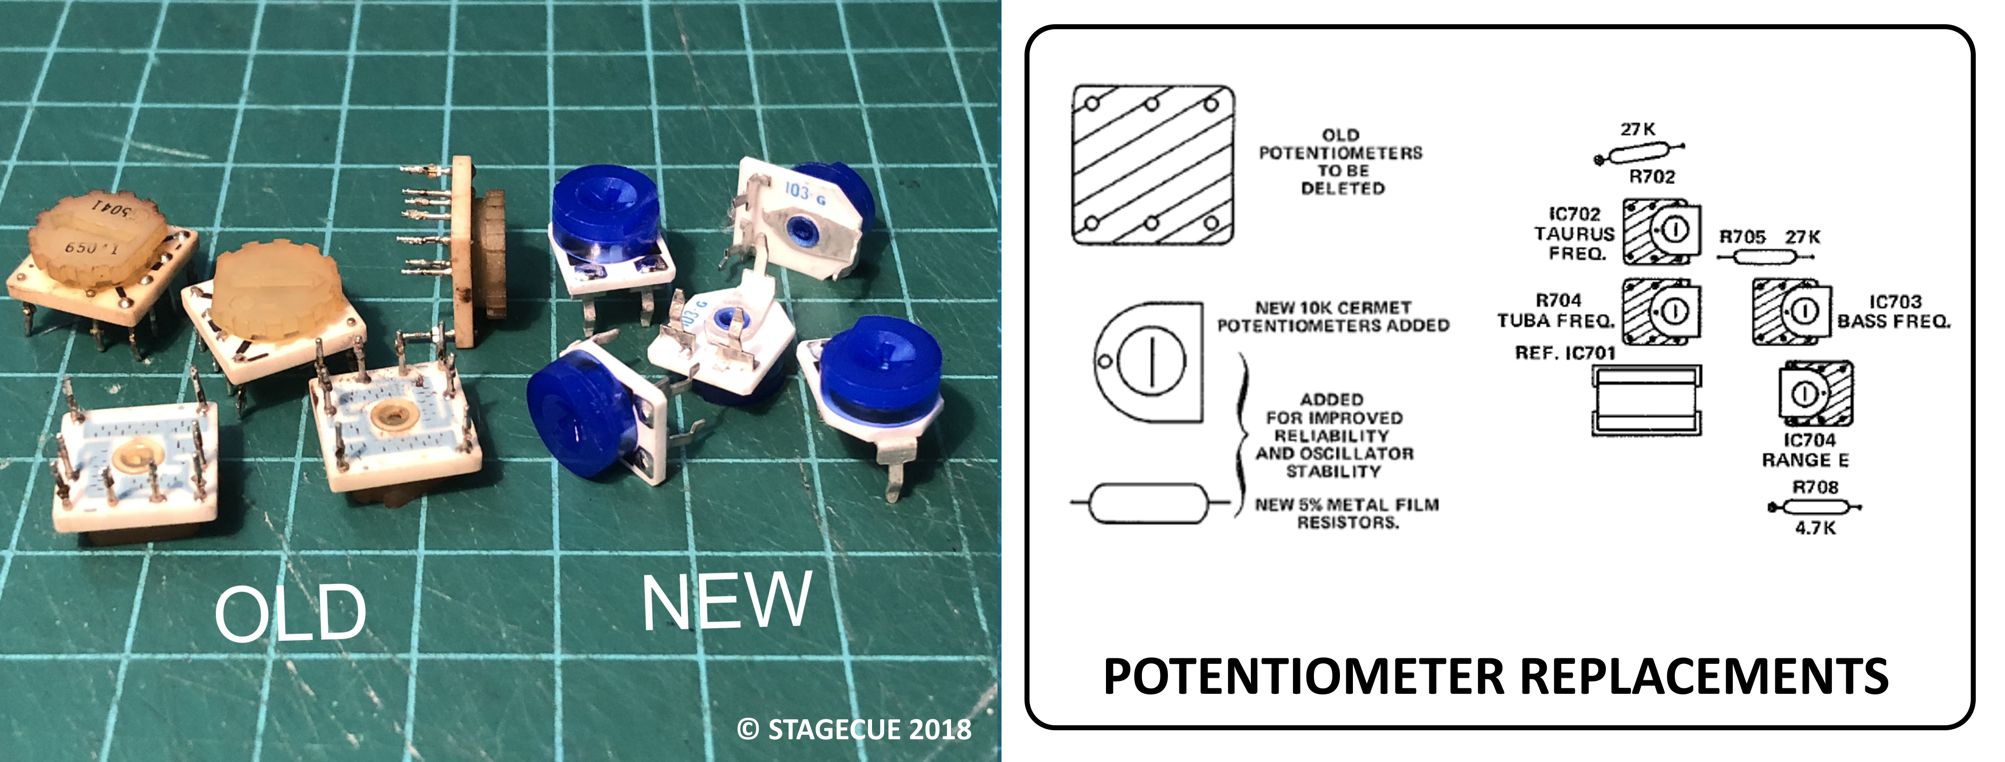
REPLACE PCB TRIMMER POTS Early in production Moog found that the Plastic-Carbon potentiometer networks, used for frequency tuning of the oscillators for the presets, were unstable. They switched to Ceramic-Metal potentiomenters in later versions... As recommended in later service manuals, I replaced the trimmers and added the complementary 1% Metal-Film Resistors...
_________________________________________
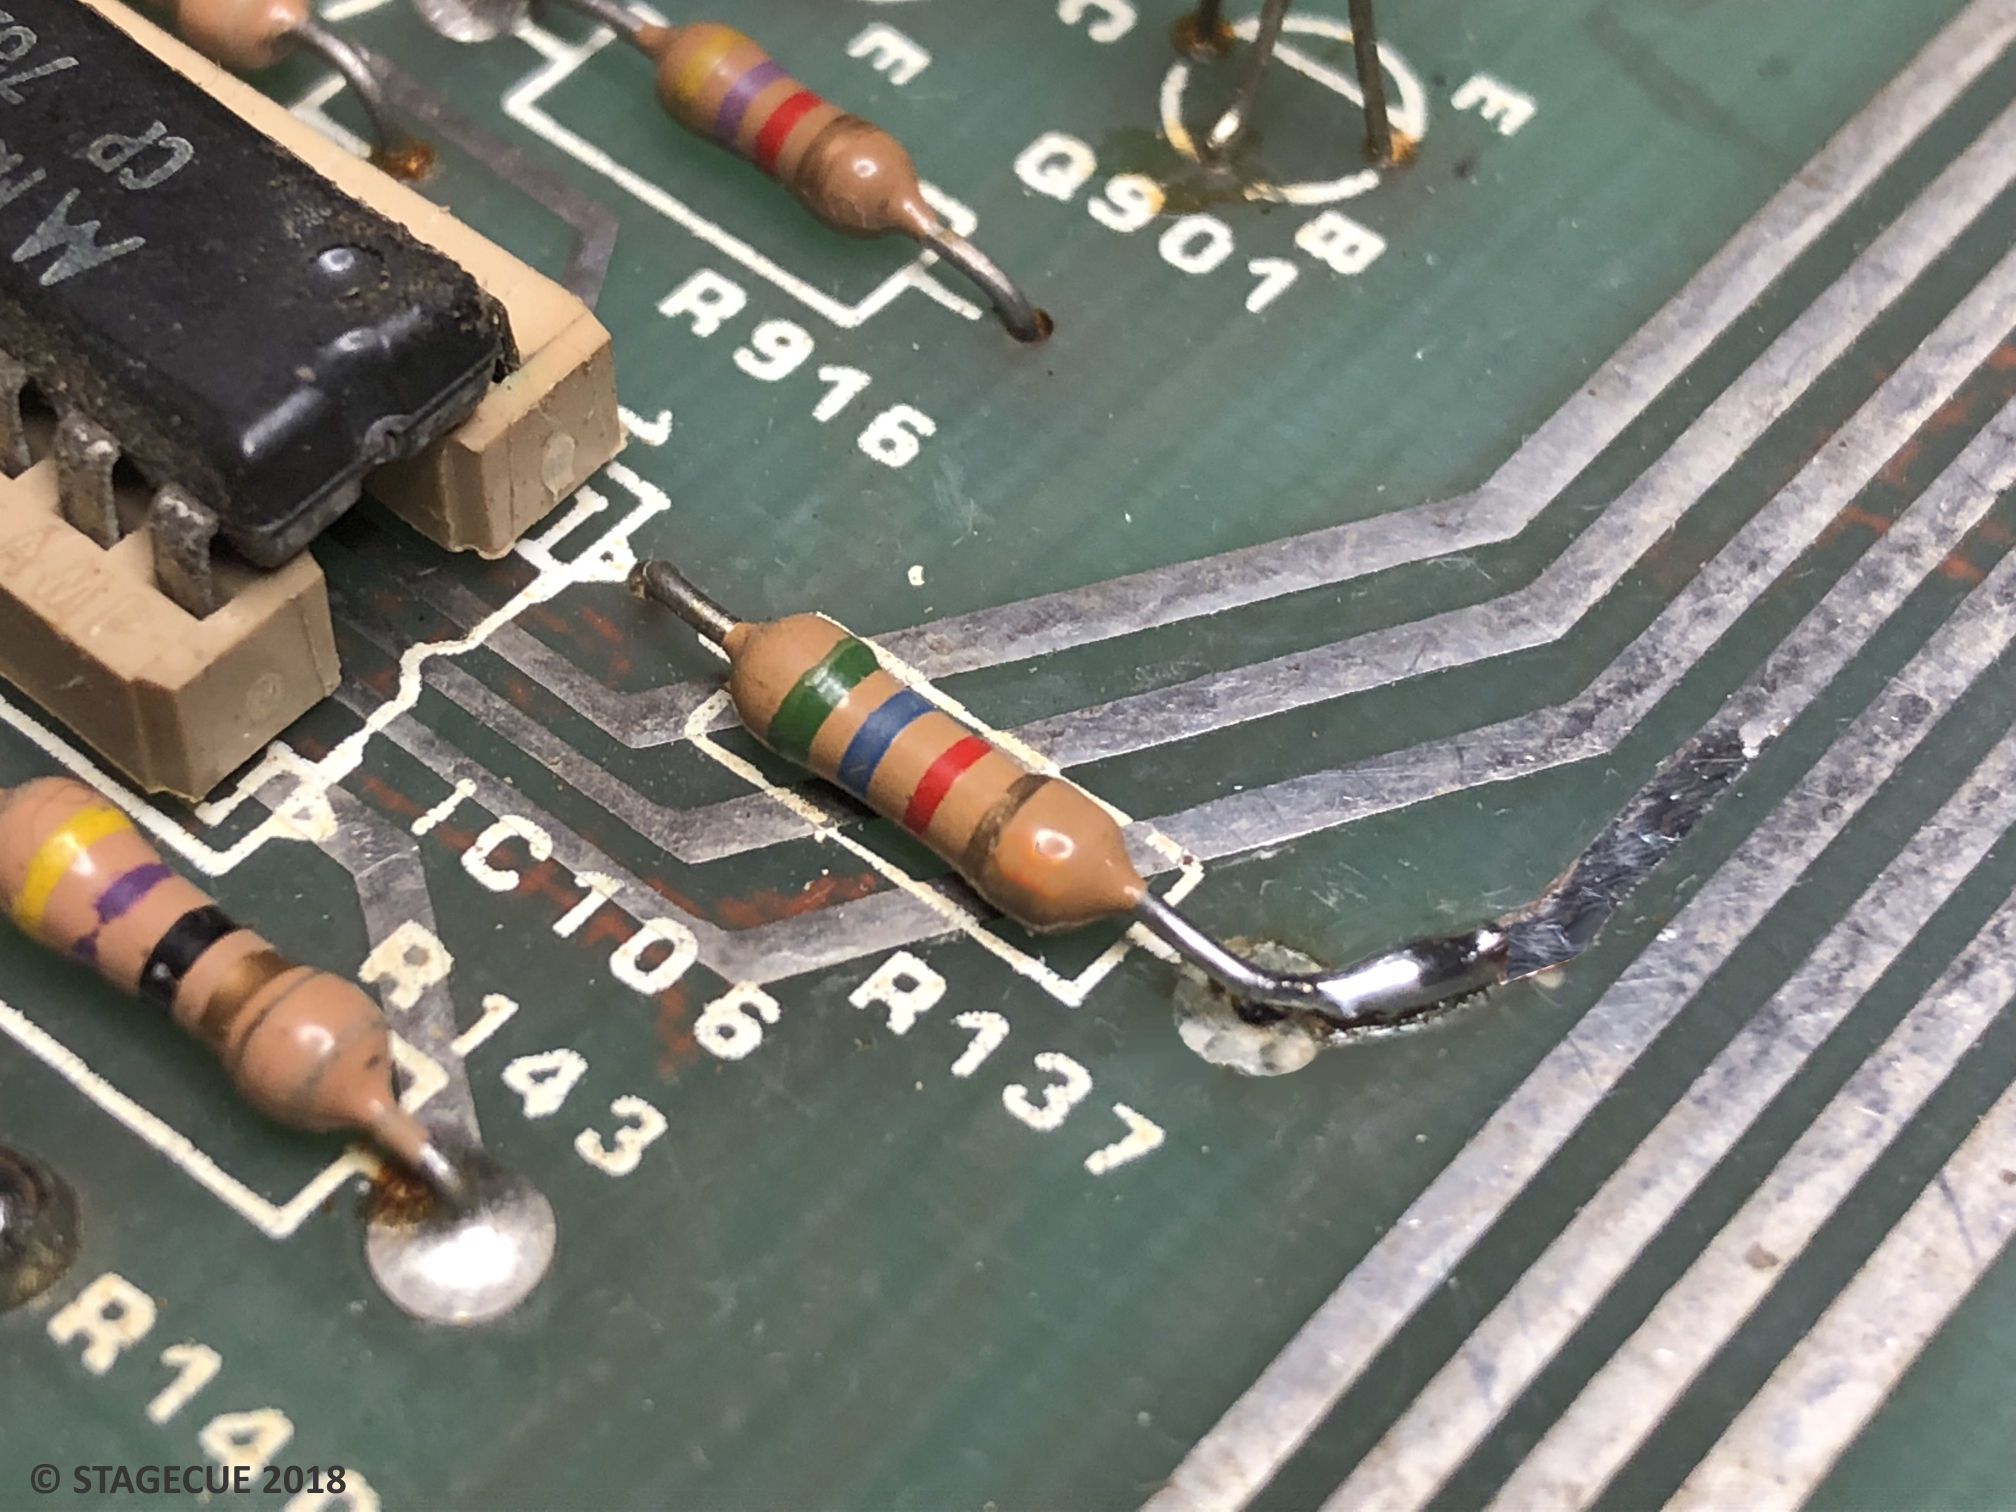
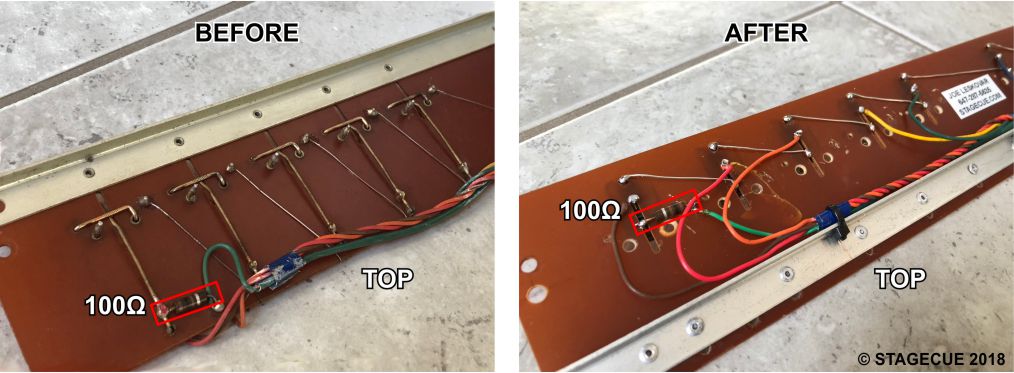
PCB MODS As recommended in a 1979 Factory Service Bulletin, I re-routed R137 to the top of the PCB to minimize leakage currents through the PCB...
_________________________________________
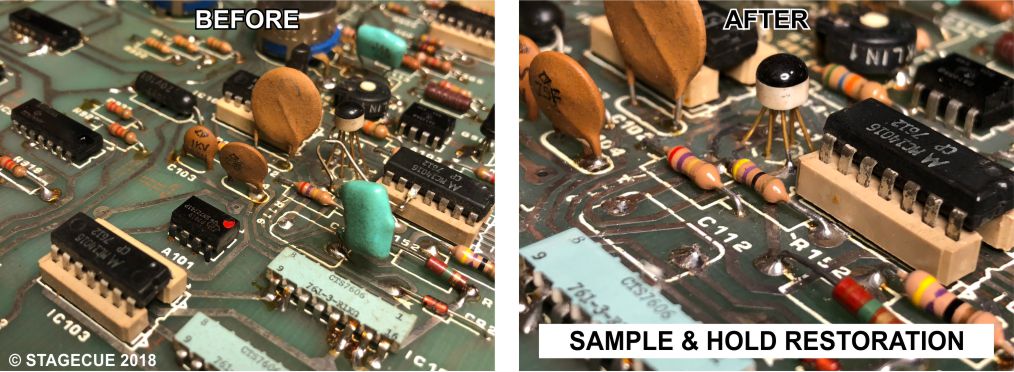
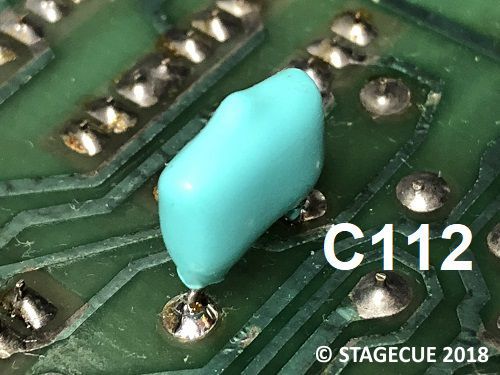
SAMPLE & HOLD CIRCUIT RESTORATION The Taurus Schematic denotes the following... TO ELIMINATE PITCH DRIFT FLOAT PIN 10 of IC106, PIN 3 OF Q101 and + SIDE OF C112... As shown in the below BEFORE Picture, this specific Taurus came from the factory with that modification. I found that re-routing R137, as above, and soldering C112 to the solder-side of the PCB and cleaning the entire area with 99% Isopropyl Alcohol eliminated any leakage problems in the Sample & Hold circuit... and it looks nicer than all of the flying components!
_________________________________________
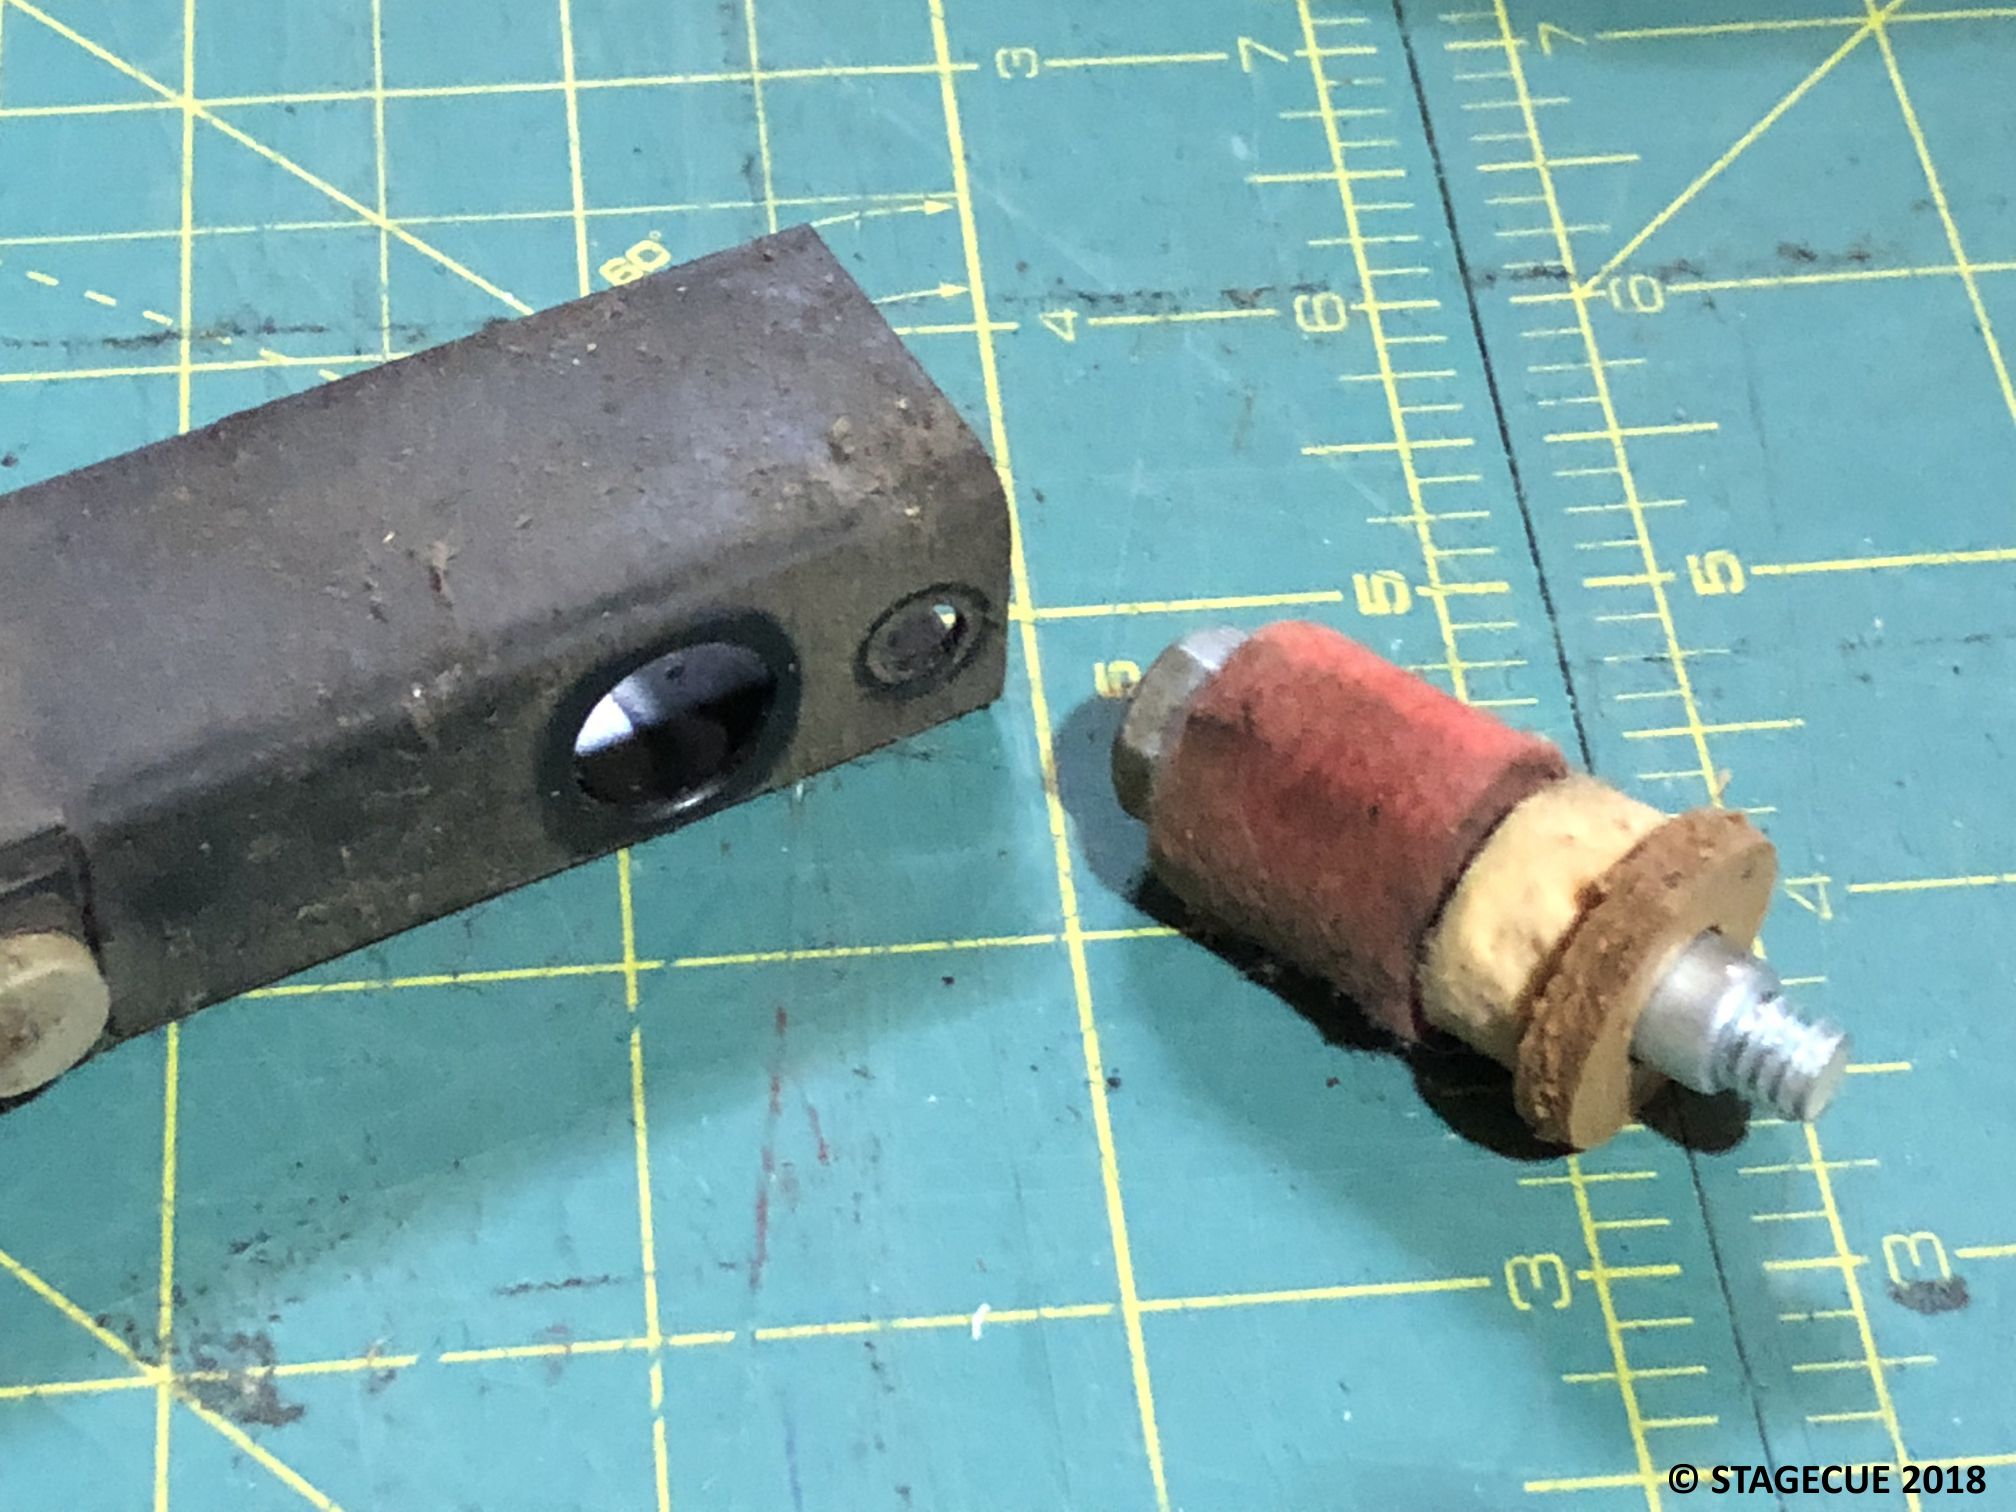
CLEANING THE PEDALS The key-bed was disassembled... this included all of the pedal-arms, springs, foam bushings and felt washers. Then the pedal-arms were degreased and the white paint was removed using paint-remover.
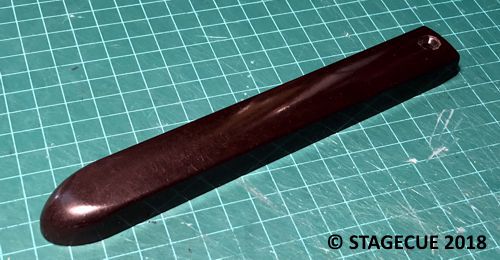
I had to purchase a pedal-cap to replace the broken one...
While the pedal arms were removed, the cast-aluminum key-bed was wire-brushed to remove any corrosion.
The pedals were reassembled awaiting the installation of the contact board.
_________________________________________
REBUILT CONTACT BOARD
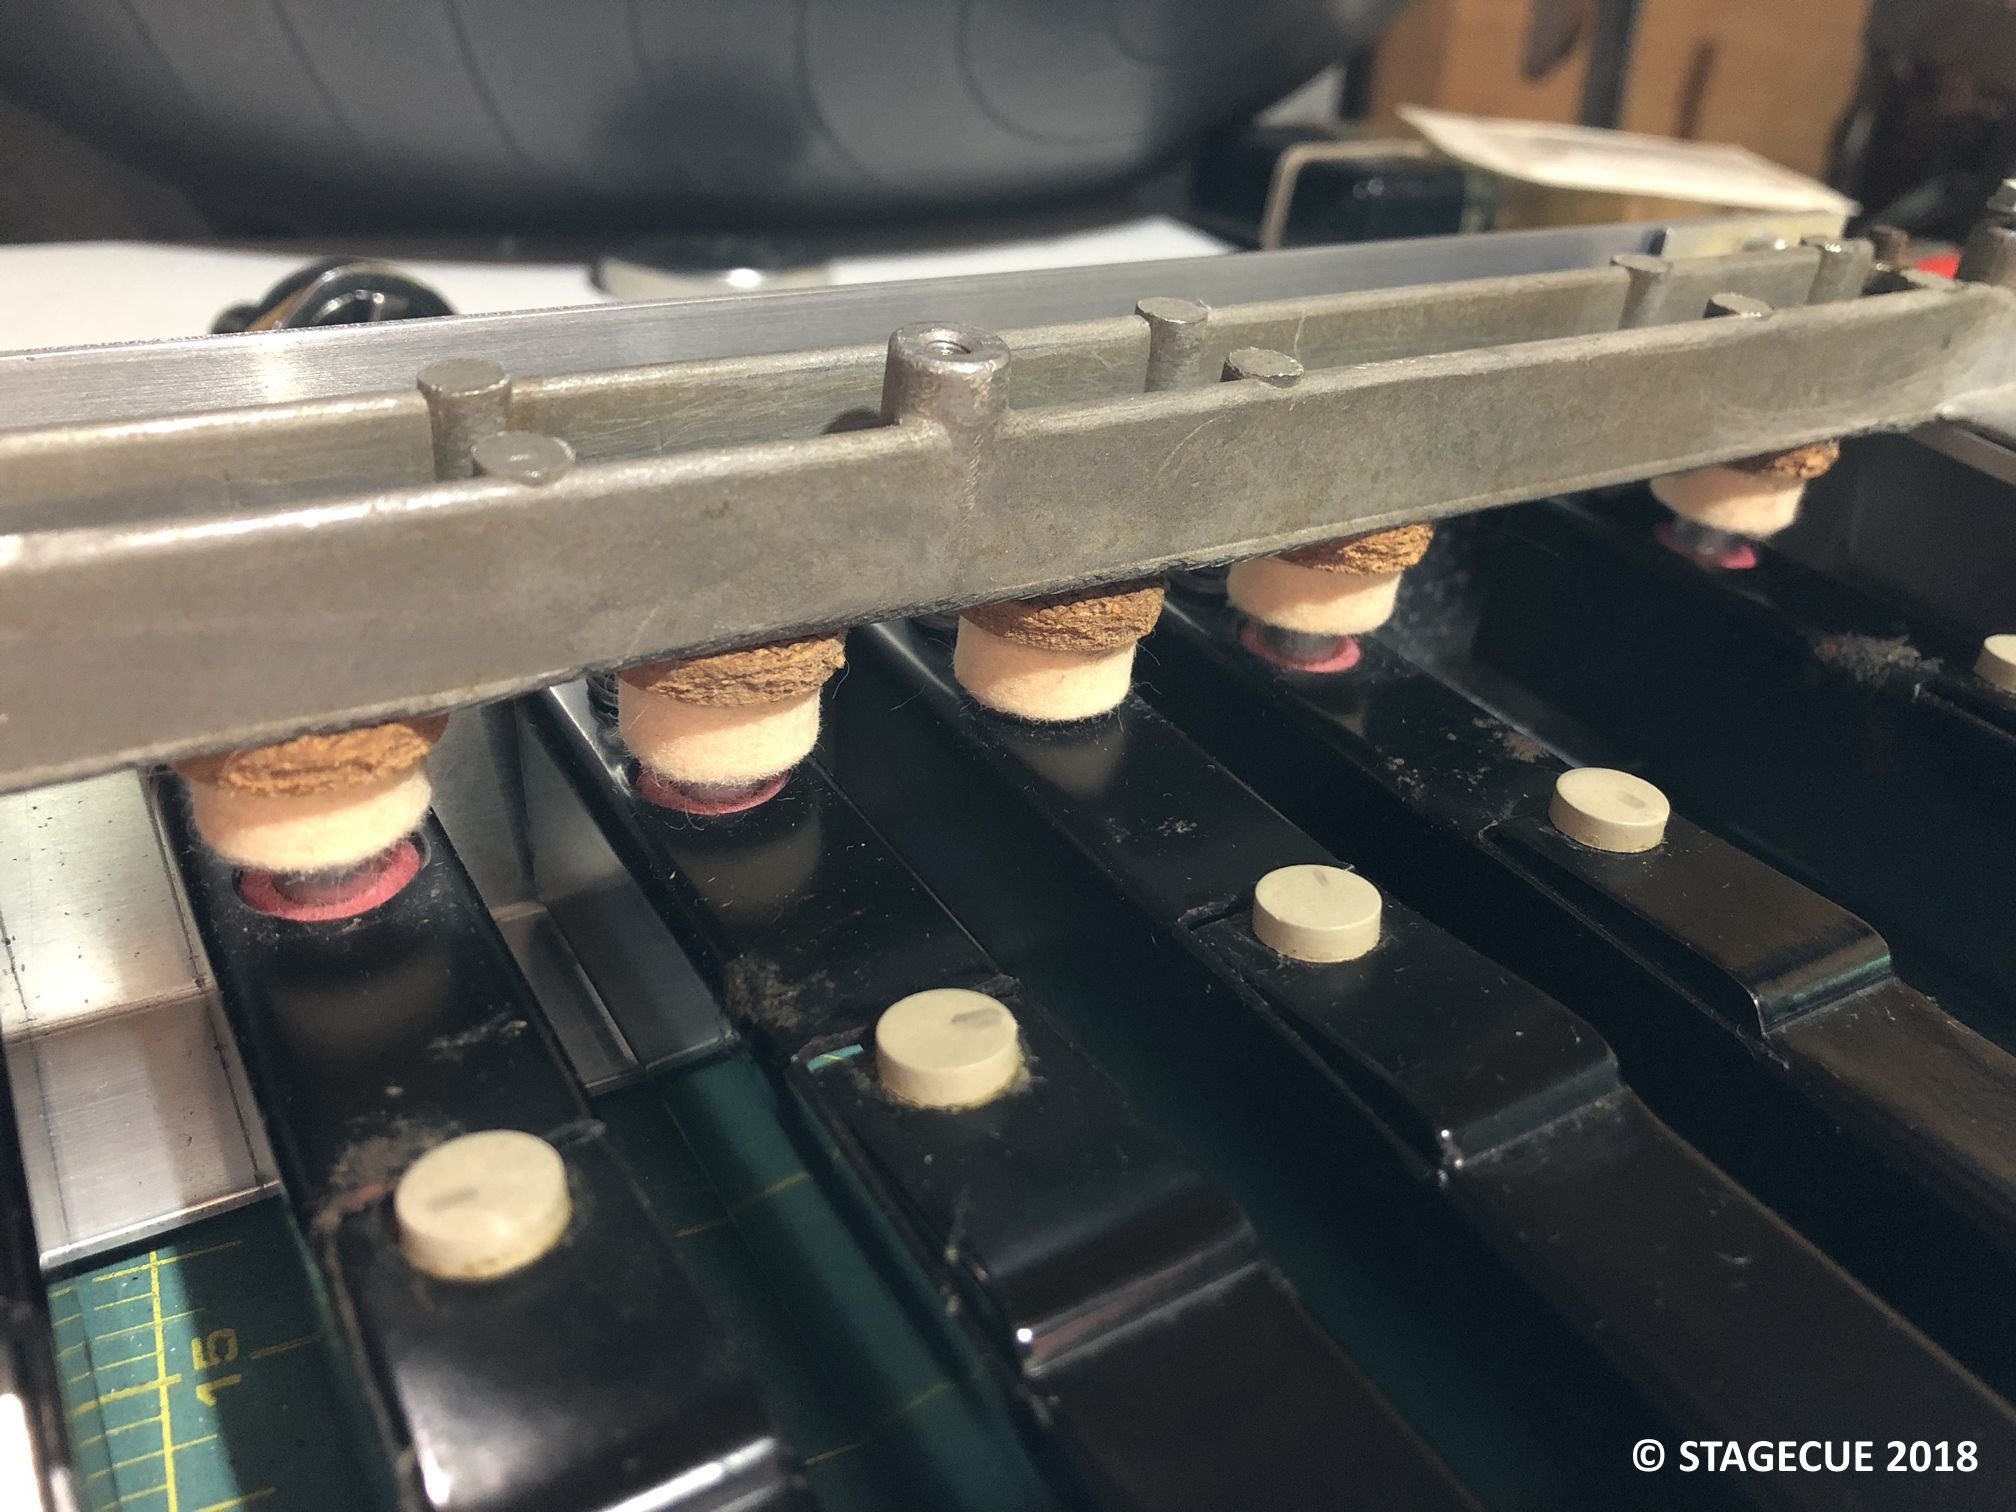
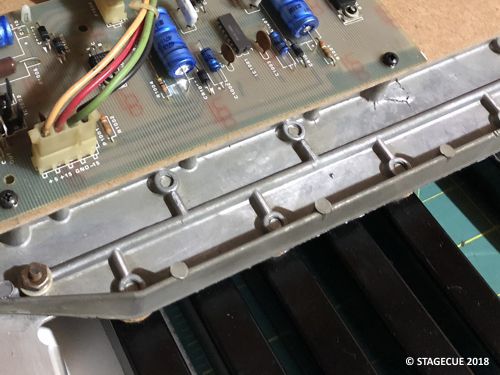
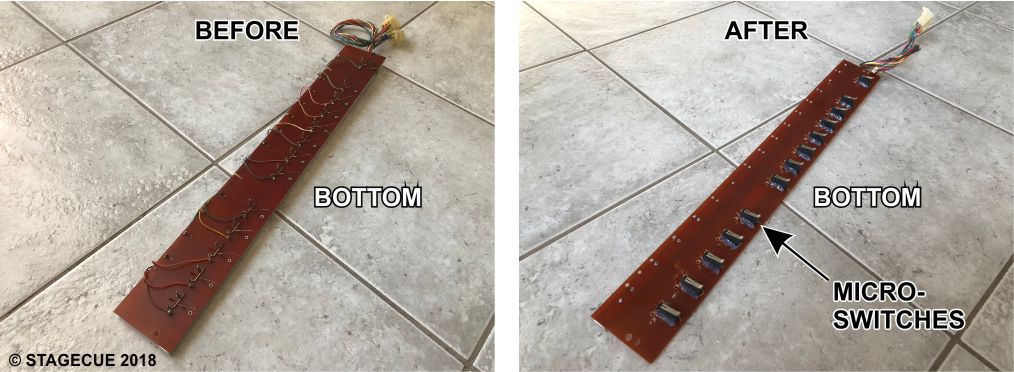
The stock Moog pedal contact board does work properly when kept clean and when not exposed to smoke, dust, dirt or other airborne contaminents... but, the contacts are Silver-Plated and are prone to tarnishing which can make the contacts intermittent causing notes to sound intermittently or not at all. Kevin Lightner, synthfool, designed and produced a replacement printed circuit board that eliminated the contact problem through the use of sealed micro-switches. That board was not available at the time of service, so, I decided to make my own and retro-fit micro-switches to the old contact board. This required removing of the harness wires, stripping all of the contact wires and repositioning the aluminum “L” bracket that adds stiffness to the Circuit Board. Then I mounted the new micro-switches to the circuit board and hard-wired all of the connections to the old harness. Here's a few before and after pix...
The board was fitted to the keybed and the micro-switch levers were adjusted so that they just touch the pedal-pads. The rebuilt contact-board works perfectly... as each pedal is depressed there is a resounding 'click' which gives you confidence that the notes will be triggered properly. _________________________________________
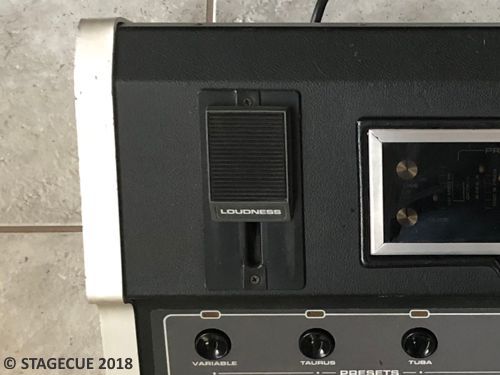
FOOT PEDAL PADS From my previous T1 Table-Top-Taurus build, I had a spare Foot-Pedal rubber pad to replace the one that was missing on the LOUDNESS foot-pedal.
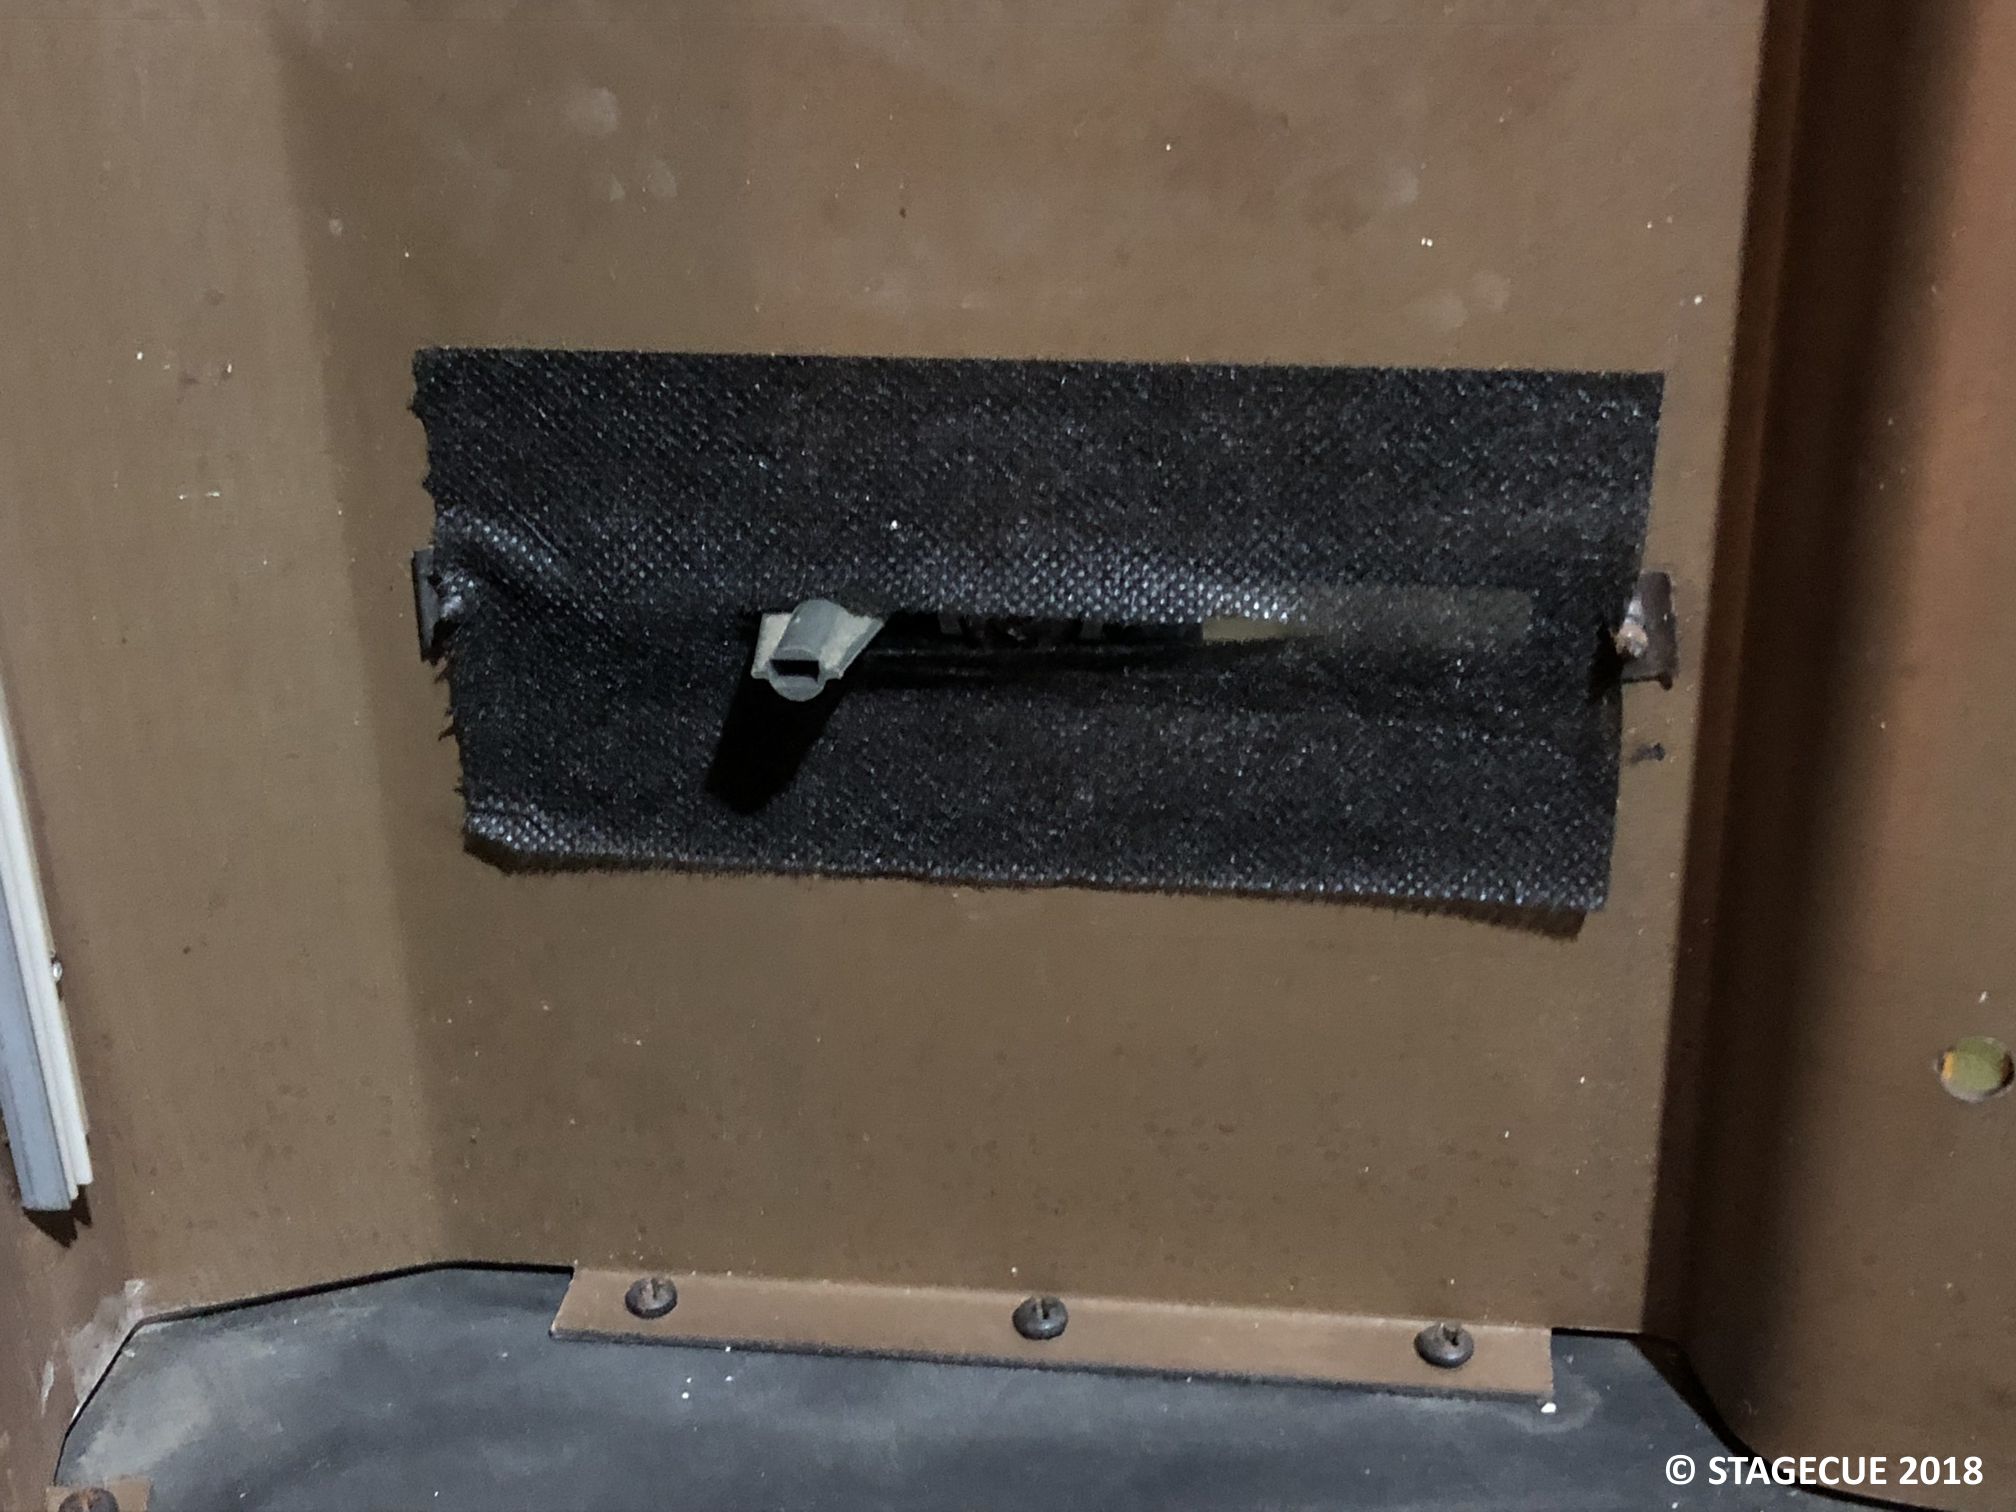
I also installed the long-lost dust-guards under the two foot-pedals to help protect the circuit board from dirt, dust and other contaminants...
_________________________________________
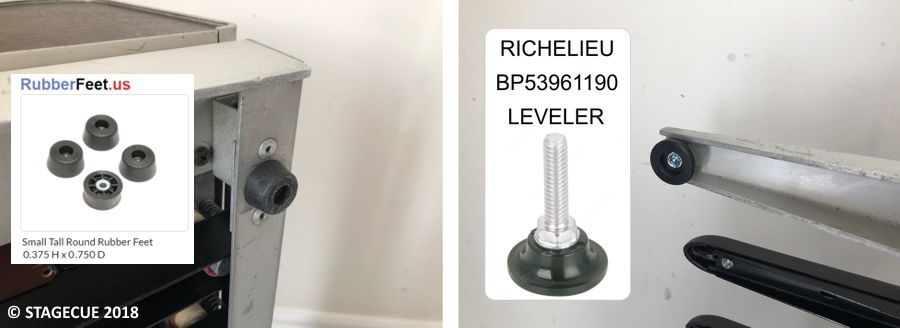
MISCELLANEOUS PARTS I replaced the front adjustable feet and added rubber feet to the bottom-rear to keep the bull from sliding around.
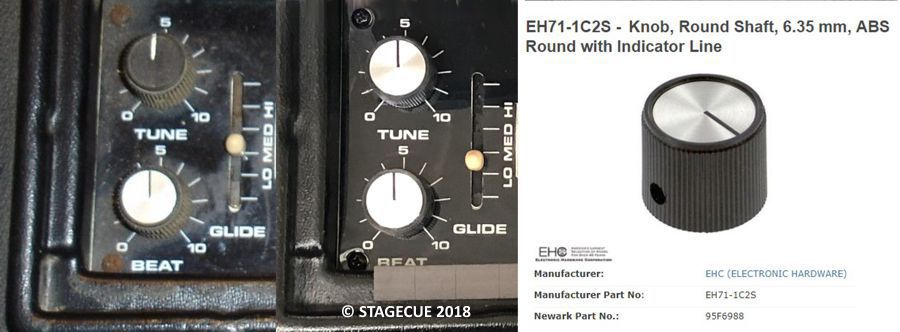
I purchased some new control knobs that are very close to the originals.
_________________________________________
BLANK PRESET CHART _________________________________________
After all of the above work, and a factory alignment, the Taurus 1 was ready for action! For a synth that is 42 Years old in 2018 it has fared well!
|